Skip to content

ATG

Walking Backwards: Ignite Your Drive, Embrace The Challenge, And Conquer Your Fitness Goals!

Click here to display content from YouTube.
Learn more in YouTube’s privacy policy.

In this fascinating video, we’ll look at the fascinating history and amazing benefits of Walking Backwards sledge training. This unique workout has evolved from its ancient beginnings in Asia to its present application as a potent tool for enhancing knee health and general fitness. Join us as we discover about the science behind it and how it has improved the lives of many people, including our dynamic narrator, Ben Patrick, also known as The Kneesovertoesguy.

The Historical Significance of Walking Backwards

Reverse sledge training has a rich history spanning generations. It originated in Asia and was passed down from generation to generation as a means of preventing arthritis in the elderly. This simple yet efficient method was prized for its capacity to keep ageing people’s joints healthy and mobile.

Louis Simmons: The Powerlifting Connection

Louis Simmons, widely regarded as one of the most effective powerlifting instructors of all time, is an important figure in the history of backward sledge training. Powerlifters in Finland, noted for their amazing leg strength, ascribed their prowess to the habit of dragging trees as part of their forestry labour, according to Louis. Realizing the possibilities of this unusual activity, Louis integrated it within the realms of fitness and strength conditioning.

Personal Testimony: Backward Training for Knee Pain

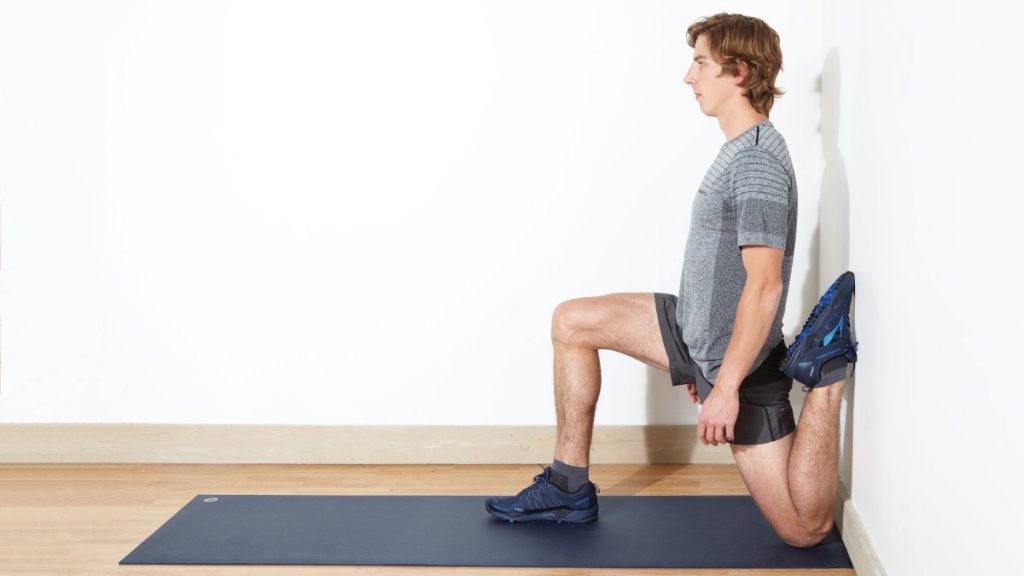
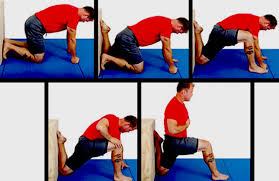
Ben Patrick describes his personal experience with backward sledge training in the video. He notes that backward mobility is especially good for people who have knee problems. Moving backward, as opposed to forward activities, can help to reposition the knee into a more advantageous posture. This change allows for different muscle involvement, which may alleviate knee discomfort and promote overall joint health.

Unlocking Knee Protection Through Walking Backwards Training

Furthermore, the video shows how consistent backward sledge training can lead to improved knee protection. Those who perform this one-of-a-kind workout eventually strengthen the muscles surrounding the knee joint. These muscles serve as a protective shield, lowering the likelihood of knee injury. Ben emphasises that he has personally experienced the transformational effect of reverse training, and that it has become an essential element of his workout routine.

Visualizing Muscle Engagement

One of the most noticeable benefits of backward sledge training is the effect it has on muscle engagement. The video shows how muscles, notably those in the quadriceps and VMO (Vastus Medialis Obliquus), protrude and engage significantly during rearward movement. Its involvement is noticeably greater than during advance exercises. Strengthening these muscles is necessary for a variety of athletic tasks, including jumping and overall lower-body performance.

A Game-Changer for Rehabilitation

Backward sledge training is a safe and effective approach for those undergoing rehabilitation. The video emphasises how this exercise can be tailored to different fitness levels, making it appropriate for people with limited mobility or those recuperating from injuries. Individuals can recover strength and mobility while limiting the danger of additional injury by gradually working within their pain-free range of motion.

Comparing Walking Backwards Treadmill and Sled Training

The movie also compares two popular backward training methods: the sledge and the treadmill. Both are effective, yet they each have significant advantages. The sledge adds resistance, which increases muscular engagement throughout the body, from the feet to the hamstrings. The backward treadmill, on the other hand, allows people to balance themselves and provides a gentler kind of exercise, making it a good alternative for those who are new to backward training or have specific mobility difficulties.

Accessible to All

Ben Patrick emphasises the necessity of making backward sledge training accessible to people of all fitness levels. This inclusivity is a core tenet of the Knee Ability System, a fitness programme meant to improve knee health and general well-being. Backward sledge training’s versatility and adaptability correspond with this goal, making it a feasible alternative for anyone wishing to improve their joint health and physical fitness.

Versatile for Various Fitness Goals

The video emphasises the adaptability of backward sledge training. It benefits not only those seeking knee pain treatment and enhanced joint health, but also those with a variety of exercise goals. Backward sledge training can help people improve their strength, endurance, and agility, no matter what their goals are. Because of its versatility, it is an excellent supplement to any workout regimen.

Walking Backwards

Backward sledge training, in conclusion, is a fascinating exercise with a long history and a growing body of scientific evidence supporting its advantages. This unusual practise has progressed from its Asian origins to its adoption by powerlifters and fitness aficionados, becoming a potent tool for improving knee health, muscle engagement, and overall fitness.

Backward sledge training, as seen in the video, provides a safe and effective alternative for anyone seeking pain alleviation, joint protection, and increased physical performance. Because of its adaptability and inclusiveness, it is suitable for people of various fitness levels and ages.

Consider incorporating backward sledge training into your programme if you’re healing from an injury, seeking to improve your lower body, or pursuing various fitness goals. With the potential to improve knee health and overall well-being, it’s an exercise worth investigating and including into your fitness routine.

mobilityabilityagility.com

mobilityabilityagility.com

Lower Back Pain: A Full Mobility Roadmap

Click here to display content from YouTube.
Learn more in YouTube’s privacy policy.

Improving Lower Back Pain: A Comprehensive Guide to Hip Mobility

In this detailed guide, we’ll look at the four essential zones of hip mobility and their importance in maintaining lower back pain. This tutorial simplifies complicated topics into easy steps, making them accessible to everyone, even if you’re in fifth grade! You’ll discover how hip mobility influences your spine, how to efficiently move through each zone, and the significance of balancing flexibility and strength.

Understanding Hip Mobility and its Impact on Lower Back Pain

Our hips are a fascinating portion of our bodies that perform a variety of functions, including rotation. The hip joint is similar to a ball and socket, and keeping it mobile is critical for a healthy low back. Issues with hip mobility can lead to pelvic tilt, hip shift, and even spine problems. To solve these issues, we will concentrate on four primary areas of hip mobility.

Zone 1: Anterior Hip Range

The anterior hip range is where we begin our adventure. The hip flexors, particularly the psoas, which connects the thigh bone to the front of the spine, are worked on in this zone. Stretching this area is essential, but it must be done gradually and vigorously in order to avoid stressing the spine. Begin with the Couch Stretch, placing your knee against a wall, then gradually progress to more advanced stretches. Remember that patience is essential, and one minute per side is a good starting point.

Zone 2: Posterior Hip Range

For spine movement and flexion, the posterior hip range is critical. To begin, we will address the calf and ankle regions, which might contribute to sciatica discomfort. Lower back stiffness can be relieved by progressively opening up these areas with stretches like the Pigeon Stretch. Remember not to rush and to keep your stretching active.

Zone 3: Outer Hip Strength and Mobility

The robust quadratus lumborum (QL) muscle is encountered when we move to the outer hip. This muscle connects the hips to the spine, and abnormalities in this area can lead to back pain. These problems can be alleviated by strengthening and stretching the outer hip. To gradually develop this area, we offer a hip internal rotation exercise. It is critical to strike a balance between strength and movement.

Zone 4: Outer Hip Flexibility

We finish our tour by looking at outer hip flexibility, which is important in actions like squatting and bending. We begin by loosening the hip area with the Butterfly Stretch. Continue to the Pancake Hold, being sure to maintain an active stretch while keeping your back flat. Finally, the Sitting Good Morning exercise strengthens the low back while increasing hip flexibility.

Balancing Mobility and Strength

The most important takeaway from this in-depth tutorial is the significance of balancing mobility and strength for a healthy low back. Mobility alone will not bring long-term relief; you must also have strength in the proper places. You can do both by working your way through these activities. Keep in mind that patience and persistence will be your best friends on your journey.

Lower Back Pain

Developing low back health takes time and entails focusing on hip mobility and strength. Understanding the four key zones of hip mobility and performing the exercises advised can help you achieve a pain-free and agile low back. If you stick with it, you’ll gain the benefits of increased mobility and strength, ensuring a brighter, healthier future for your back.

mobilityabilityagility.com

mobilityabilityagility.com

How to Reverse Shoulder Pain

Click here to display content from YouTube.
Learn more in YouTube’s privacy policy.

How to Reverse Shoulder Pain

How to Reverse Shoulder Pain – this video, we will explore a comprehensive guide to strengthening shoulder muscles, which is essential for injury prevention. Ben Patrick, famously known as The Kneesovertoesguy, shares valuable insights on how to perform these exercises effectively and why they are crucial for shoulder health. By the end of this guide, you’ll understand the significance of shoulder muscle strength and how it can benefit you in various aspects of life.

Proper Form is Key

Before diving into the specifics of the exercises, it’s crucial to understand the importance of maintaining proper form. Ben emphasises that your elbow should be just inside the kneecap on the muscle you’re targeting. This ensures that you are targeting the right muscle group and not compromising your form during the exercises.

Maintaining Posture

During these exercises, maintaining proper posture is essential. Ben advises controlling the movement of your body and keeping your posture upright. This not only enhances the effectiveness of the exercises but also reduces the risk of injury.

Rotational Movement

The shoulder muscle exercises discussed in this guide involve rotational movements. Ben demonstrates the importance of this movement by rotating his torso at about a 45-degree angle to the thigh. This angle allows for optimal engagement of the shoulder muscles, providing both strength and flexibility.

The 12 Rep Standard

To gauge your progress, Ben recommends following the standard of 12 repetitions per exercise. These 12 reps should be performed with 10 percent of your body weight. This standard helps you track your development over time, ensuring that you are consistently challenging yourself.

Variations for Maximum Benefit

Ben introduces variations to these exercises to maximise their benefits. He explains that there are different angles and ranges of motion that can be explored. For instance, you can start with the standard form, then gradually turn your torso as you reach failure. This approach allows you to work on different aspects of shoulder strength and flexibility.

The Importance of Stretch

Stretching is a key component of these shoulder exercises. Ben emphasises that while both full rotation and partial rotation have their merits, it’s essential to find a balance between them. Stretching to the fullest extent may make the exercise easier, but it’s crucial to challenge yourself to achieve the desired results.

Avoiding Cheating To Reverse Shoulder Pain

To get the most out of these exercises, Ben highlights the importance of avoiding cheating. He demonstrates how moving your leg during the exercise can make it easier but less effective. To prevent this, focus on rotating your torso without letting your leg move. This ensures that the targeted shoulder muscles are fully engaged.

Context Matters: Shoulder Muscle Training

Understanding the context of these exercises is vital. Ben explains that these exercises specifically target the muscles that attach the shoulder to the socket. Strengthening these muscles plays a significant role in preventing shoulder pain and injuries. He personally credits these exercises with alleviating his chronic shoulder pain.

Counteracting Throwing-Related Injuries

Ben draws an interesting parallel between these exercises and throwing, a common cause of shoulder injuries. By strengthening the muscles involved in the opposite movement of throwing, you can significantly reduce your risk of shoulder injuries. This insight is especially valuable for athletes in throwing sports.

Sitting Variation

For those looking for an alternative approach or working in a gym setting, Ben suggests a sitting variation of these exercises. Sitting on a bench with your foot up on the bench, you can still achieve the 45-degree torso angle and maintain good posture. This variation offers an effective alternative to the standard standing exercises.

Back Health and Reverse Shoulder Pain

Ben also emphasises the importance of considering back health when working on shoulder strength. He categorises these exercises into different muscle groups: rotators, power raises, scapular retractors, and rear deltoids. These exercises collectively contribute to shoulder health and lower back stability.

The Three Shoulder Standards

Within the ATG (All Things Gym) system, there are three shoulder standards, each targeting different aspects of shoulder strength. These standards are: external rotation with ten reps; power raises with ten reps; and trap three raises with eight reps. Achieving proficiency in these standards is a significant step towards injury prevention and overall shoulder health.

Chasing the 1% To Reverse Shoulder Pain

Ben’s goal is to help individuals achieve exceptional results. He notes that around 98% of people he has trained initially struggle with these shoulder standards. However, by diligently working on them, you can join the 1% of individuals with exceptional shoulder strength, which greatly reduces the risk of injuries.

Reverse Shoulder Pain

In conclusion, Ben Patrick, The Kneesovertoesguy, has provided us with a comprehensive guide to strengthening shoulder muscles for injury prevention. By following these standards and exercises, you can enhance your shoulder strength, reduce the risk of shoulder injuries, and enjoy a more active and fulfilling life. Remember, it’s not about perfection but progress, and these exercises can help you progress toward a healthier, stronger you.

mobilityabilityagility.com

mobilityabilityagility.com

Training for Longevity: A Unique Workout for All Ages

Click here to display content from YouTube.
Learn more in YouTube’s privacy policy.

Training for Longevity

In this video, we’ll look at a unique fitness regimen that transcends age. Derek, 45, appears to be in his 20s on the basketball court, and he’s here to show us how he practises. Derek’s mother, who is 69 years old, trains in a similar method and has joined them for hundreds of these longevity workouts. It’s an uplifting example of how a well-planned exercise programme can benefit people of all ages.

Starting with the Sled: Building a Strong Foundation

A sledge exercise kicks off the session. This exercise is unusual in that it begins slowly and can be tailored to your fitness level. Derek shows how to push the sledge while keeping perfect technique. It entails taking large strides and fully extending the back leg. The goal is to improve mobility and strength from the ground up.

The Magic of Sled Workouts

Sledge workouts are an important part of this training regimen. These differ from standard leg workouts in that the weight does not bear down on you; rather, it comes from the ground up. Sledge workouts are thus fundamentally safer than other leg exercises. The sled’s charm rests in its adaptability. You can push it both forward and backward, and each way has its own set of advantages. Forward pushes improve strength, and backward pushes improve rehabilitation and conditioning.

The Tibialis Raise: Strengthening the Lower Leg

The tibialis raise comes next, which targets the muscles in the lower leg opposite the calf muscles. Derek notes that the tibialis posterior is sometimes disregarded but plays an important role in overall leg strength. This exercise can be done with a variety of apparatus, such as a tip bar or a wall. Tibialis training is vital for anyone trying to improve their leg strength and stability.

Pigeon Pose and Hip Flexor Stretches

When you’ve worked on leg strength, it’s time to work on mobility. Stretches like the pigeon stance are included in the workout. This pose stretches the hip flexors and piriformis. It’s especially good for people who sit for long periods of time, which can develop tight hips.

The Couch Stretch: Unlocking Tight Hip Flexors

Another great exercise to counteract the detrimental effects of prolonged sitting is the couch stretch. It aids in the release of tight hip flexors and quads, which are frequently affected by modern sedentary lives. This stretch may be difficult at first, but with time and repetition, you will notice major changes in hip flexibility and mobility.

Push-Ups for Upper Body Mobility

It’s time to move on to upper body mobility. Full-range push-ups are an essential component of this workout. The goal here is not just to gain power, but also to fully open the chest and shoulders. This exercise is designed to improve upper-body balance and flexibility. You may enhance your posture and upper body mobility by performing these push-ups.

Building Shoulder Stability with External Rotations

The final exercise in this workout regimen is designed to improve shoulder stability. External rotations entail retaining a precise position while externally rotating the arm. It’s a terrific workout for strengthening the muscles that keep the shoulders stable. The majority of people have weak external rotators, which can cause shoulder difficulties. This exercise can help prevent such problems and improve overall upper body strength.

A Complete Workout for Longevity

Finally, this one-of-a-kind fitness regimen incorporates a variety of activities aimed at improving longevity and overall well-being. It all starts with laying a solid foundation with sledge workouts and lower leg strengthening. Then it concentrates on mobility, focusing on areas like the hips and quads that often suffer as a result of our contemporary lifestyles.

Longevity

Upper body mobility and stability are also covered, emphasising the significance of having a good balance of strength and flexibility. This workout is about feeling fit and agile at any age, not simply looking great. Derek and his mother are living proof that, with the appropriate exercise, you can stay young for decades. Thus, whether you’re 45 or 69, there’s no reason to wait any longer to begin preparing for a healthier, more active future.

mobilityabilityagility.com

mobilityabilityagility.com

ATG Squat: The Ultimate Guide To Building Resilient Knees And Long-lasting Strength – Your Journey To Vitality Starts Here!

Click here to display content from YouTube.
Learn more in YouTube’s privacy policy.

ATG Squat School: Building Stronger Knees and Longevity

Finding the correct balance between challenging your body and preventing injury may be a delicate art in the realm of fitness. That’s where ATG Squad School comes in: a curriculum designed to improve your squatting skills while lowering your chance of pain and injury. In this video, we’ll look at the three important components of ATG Squat School, see how the programme may assist people of all ages, and look at real-life success stories that demonstrate its usefulness.

The Three Keys of ATG Squat School

The ATG Squat Academy emphasises preparation, form, and balance. A full warm-up is required before beginning squats. Sledge work, ground-up movements and mobility exercises are the three basic components. These warm-up strategies can be adapted to your unique requirements and available equipment. You’re ready to begin the squat practise once you’ve thoroughly warmed up. Fernando, our coach, walks us through the steps, emphasising the significance of proper technique and the program’s unique benefits.

Customized Warm-Up: Preparing for Squat Success

Warming up before beginning any exercise is critical, and ATG Squat School acknowledges this by providing a customised method. Warming up, whether with a sledge, practising ground-up movements, or focusing on mobility exercises, lays the stage for a good squatting session. This personalised strategy ensures that you’re ready to challenge your body safely and effectively while avoiding unneeded strain.

Perfecting Squat Form: The Key to Knee Health

Perfecting your squat form is an important aspect of ATG Squat School. You may improve your knee health and overall performance by reaching the correct knee posture and implementing particular procedures. Maintaining good alignment and engaging the right muscles are essential for successful squats. Fernando demonstrates the proper knee-over-toe technique, which strengthens tendons, fascia, and major muscles, resulting in greater knee stability and strength.

Transitioning to Split Squats: A Step Towards Longevity

The transition from normal to split squats is an important stage in ATG Squat School. Split squats have a distinct advantage in that they promote balance while also strengthening hip muscles. These exercises are very good for players who want to improve their longevity in sports like basketball. Split squats increase knee protection and overall performance by treating muscular imbalances and focusing on controlled, gradual eccentric motions.

Nordic Hamstring Curls: Strengthening Behind-the-Knee Muscles

Strengthening the muscles behind the knee is a lesser-known but crucial component of knee health. This is where Nordic hamstring curls come into play. These workouts target the hamstrings while also improving knee stability. The key is eccentric motion, which emphasises controlled movements for optimum effect. By including Nordic hamstring curls into your regimen, you are strengthening the protective aspects for your knees and improving your overall athletic performance.

Success Stories: Longevity and Athletic Achievement

The effectiveness of ATG Squat School is supported by real-life success stories. Derek, a 45-year-old athlete, discusses his path from injury to athletic prowess. He discovered a “cheat code” in split squats that altered his basketball performance. Over time, split squats helped him balance his hips, enhance mobility, and keep his competitive edge. Athletes like Derek may live active, pain-free lives by focusing on improving form, addressing imbalances, and gradually gaining strength.

The Science Behind Strong Knees

The ATG Squat School is more than simply a set of exercises; it is a scientifically based approach to knee health. Full-range squatting, which engages the VMO (vastus medialis obliquus) muscle and preserves knee health, has been shown in studies to be beneficial. Individuals can build a strong foundation for injury prevention and overall joint health by constantly working on strengthening the muscles and tendons around the knee joint.

Embrace ATG Squat School for Longevity

ATG Squat School is a holistic method to improving knee health, boosting longevity, and optimising athletic performance. Individuals can create strong knees that support a lifetime of activity by focusing on specialised warm-ups, refining squat form, progressing to split squats, and engaging in hamstring curls. ATG Squat School is a fantastic resource for anyone trying to attain a mix of challenge and safety in their fitness path, with actual success stories and scientific proof. So, lace up your shoes, accept the research, and join the ATG Squat School movement towards stronger, healthier knees!

https://mobilityabilityagility.com/

https://mobilityabilityagility.com/

Overcoming Back Pain: The Ultimate Guide Squat Like a Teen!

Click here to display content from YouTube.
Learn more in YouTube’s privacy policy.

Overcoming Back Pain: A Journey to Pain-Free Squats

The speaker shares their experience of dealing with back pain while performing back squats. They discovered that certain squat variations caused less pain, leading them to explore the reasons behind these differences. By understanding the movements and identifying weaknesses, they were able to build resilience and eventually perform squats without any discomfort.

Identifying the Problem:

Back squats used to leave the speaker waking up with pain, leading them to seek alternatives. They switched to front squats and later super upright VMO squats, but pain persisted. Realizing that the pain was specific to certain squat variations, they decided to investigate further.

Studying the Movements:

The speaker carefully studied the subtle differences between various squat variations to pinpoint the root of their pain. By closely examining the mechanics of each movement, they hoped to find the missing link causing their discomfort.

Discovering the Weakness:

Through their analysis, the speaker identified a specific gap in their strength and flexibility that was likely responsible for the pain. This gap was related to a particular position of the back during the squat, both in the bottom and top portions.

Addressing the Back Pain:

To build resilience in the weak area, the speaker incorporated training with modest range in a CD good morning. This exercise replicated the back’s position in the bottom of the squat and helped prepare their back for the top portion of the squat. They also focused on back extension exercises to improve overall strength and support the squat movements.

Improving Strength and Ability:

As the speaker consistently trained with the CD good morning and back extension exercises, they noticed improvements in their strength and ability. Over time, this training allowed them to handle the demands of various squat variations without experiencing pain.

Achieving a Pain-Free Lifestyle:

Thanks to their dedicated efforts and targeted training, the speaker was finally able to return to pain-free squats. They found that addressing the specific weakness in their back made a significant difference in their squatting experience.

Overcoming back pain and achieving a pain-free lifestyle is possible with targeted training and a focus on building resilience. By studying the movements, identifying weaknesses, and addressing specific gaps in strength and flexibility, individuals can improve their squatting experience. Consistency and patience are essential on this journey to a pain-free lifestyle, and understanding the body’s needs can lead to success. With the right approach and dedication, anyone can overcome back pain and enjoy the benefits of a pain-free squatting experience.

mobility

mobility

Couch Stretch: Unlock Your Hips And Say Goodbye To Tightness – Capture The Photo Of A Man With Flexible And Relaxed Hips!

couch stretch

Welcome to mobilityabilityagility.com, where you will find everything you need to improve your mobility and agility. In this article, we’ll examine the Couch Stretch, a potent mobility exercise that strengthens the quadriceps and hip flexors while easing knee discomfort and enhancing general health. The Couch Stretch is a useful supplement to any mobility training regimen, whether you’re an athlete aiming to enhance performance or someone searching for relief from knee discomfort.

Understanding the Couch Stretch

Doing the Couch Stretch is a straightforward yet powerful exercise that has you kneeling with your back foot resting against a sofa or other raised surface, extending one leg at a time. Deep hip flexor and quadriceps stretches in this posture aid in releasing tension and enhancing lower body mobility.

Preparing for the Couch Stretch

Be careful to warm up your muscles with modest aerobic exercise and dynamic stretches before beginning the Couch Stretch. Warming up reduces the possibility of injury and prepares your body for longer durations.

Performing the Couch Stretch

Follow these steps to perform the Couch Stretch correctly:

  1. Locate a seat or other raised surface that is appropriate.
  2. Kneel on the ground with one leg stretched in front of you and the other behind you, placing your back foot’s top on the sofa.
  3. Keep your back straight and contract your core.
  4. Slowly lean forward while maintaining a straight back and balanced hips.
  5. Feel the deep stretch in your quadriceps and hip flexors as you hold the stretch for 20 to 30 seconds on each leg.

Benefits of the Couch Stretch

Couch Stretch offers a myriad of benefits for your mobility training and overall well-being:

  1. Improved Hip Flexor Mobility: The stretch lengthens the hip flexor muscles, which can get tight and constrained by sitting for too long and not doing mobility exercises.
  2. Knee pain relief: Stiff hip flexors can make knee pain and discomfort worse. The Couch Stretch helps ease knee discomfort by releasing tension in the hip flexors.
  3. Enhancing hip mobility and flexibility also lowers the likelihood of injuries sustained when engaging in physical activity, which improves lower body function.
  4. Improved hip mobility can help athletes perform better in sprinting, leaping, and agility-based sports, which benefits their overall athletic performance.

Incorporating the Couch Stretch into Your Mobility Routine

Use the Couch Stretch in your mobility training regimen 2-3 times per week to reap the full rewards of this exercise. You may do the stretch as a stand-alone exercise or just after your normal workouts.

Modify

couch stretch

If you find the traditional Couch Stretch too intense, consider these modifications:

  1. Choose a lower surface: To lessen the impact of the stretch, choose a lower bench or step rather than a sofa.
  2. Support with props: For additional comfort and support, place a cushion or foam roller beneath your back knee.

Tips for Safe and Effective Stretching

Keep these tips in mind when performing the Couch Stretch:

  1. Keep your lower back from arching excessively; keep your spine in a neutral position.
  2. Take a few long breaths and gently extend your body without straining.
  3. To prevent damage, gradually increase the stretch’s intensity over time.

When doing the Couch Stretch is a useful mobility exercise that eases knee discomfort while working on the hip flexors and quads. You may increase general mobility, improve lower body function, and improve athletic performance by including this stretch in your mobility training regimen. Visit mobilityabilityagility.com to embrace the power of the Couch Stretch and reach new heights of comfort, flexibility, and wellbeing. Start today on the path to a more active and pain-free life!

L Sit: The Ultimate Guide To Sculpting Rock-Hard Abs And Building A Strong Foundation – Unleash Your Core Potential!

L Sit

Welcome to mobilityabilityagility.com, where we are committed to helping you improve your mobility training and general fitness. In this post, we’ll look at the L Sit, a fantastic bodyweight exercise that works your core and allows you to gain amazing body control. Whether you’re a fitness fanatic or a beginner, the L Sit allows you to strengthen your core, enhance mobility, and improve your physical performance.

Understanding the L Sit Exercise

The L Sit is a static position in which you support your body with your hands while extending your legs in front of you to form a “L.” This difficult yet gratifying workout primarily focuses your core muscles, such as the abs, hip flexors, and lower back, while also exercising the shoulders, triceps, and chest.

Progressing with L Sit Variations

If you’re new to the L Sit, start with variations that help you build the necessary strength and flexibility. Begin with bent-knee L Sits, where you lift your body off the ground with your knees bent and tucked towards your chest. Gradually extend your legs until you achieve the full L Sit position.

Building Core Power

Start with variants that help you gain the essential strength and flexibility if you’re new to the L Sit. Begin with bent-knee L Sits, in which you elevate your body off the ground, knees bent and tucked towards your chest. Extend your legs gradually until you reach the complete L Sit posture.

Improving Hip Flexibility

Achieving the full expression of the L Sit necessitates a high level of hip flexibility. Regular L Sit progression practise can assist improve hip mobility and flexibility, resulting in a greater range of motion in various exercises and motions.

Engaging Your Upper Body

The L Sit works your core and hips while also challenging your upper body. Your shoulders and triceps support your body weight, resulting in enhanced upper body strength and endurance.

Advancing Your L Sit Practice

If you’ve mastered the L Sit, try these advanced versions. Straddle L Sits, V Sits, and L Sit to Handstand are all challenging progressions that put your body control and strength to the test.

Incorporating the L Sit into Your Mobility Training

The L Sit is an excellent supplement to any mobility training programme. It works in conjunction with other mobility exercises to improve total body control and functional strength. Incorporate the L Sit in your workouts 2-3 times per week for best results.

Tips for Optimal L Sit Performance

Consider these tips to maximize your L Sit experience:

  1. To avoid injuries, warm up your wrists, shoulders, and core before attempting the L Sit.
  2. Begin with bent-knee L Sits, eventually progressing to complete L Sits as your strength and flexibility increase.
  3. Maintain a downward and engaged posture with your shoulders, and aggressively press through your palms to support your body.
  4. Exercise L For greater stability and comfort, sits on parallel bars, parallettes, or robust dip bars.
  5. Throughout the workout, take deep breaths and have a firm concentration on form and alignment.

The L Sit is an inspiring mobility exercise that helps you to strengthen your core and gain control of your body. Accept the challenge of learning this difficult exercise and see the tremendous benefits it offers to your overall mobility training. The L Sit not only strengthens the core but also improves hip flexibility and upper body engagement. Go at your own speed and experiment with advanced versions to push yourself even farther. With mobilityabilityagility.com, you can unleash your entire potential with the L Sit and achieve a new level of core power, mobility, and self-confidence.

Trap 3 Raises: The Ultimate Guide To Building Massive Traps And Achieving A Dominant Physique!

Welcome to mobilityabilityagility.com, your go-to site for mobility exercises and training. In this article, we will investigate the efficacy of Trap 3 Raises, an exercise that targets the frequently overlooked middle back muscles. Learn how this exercise can help you improve your upper body strength and mobility.

Trap 3 Raises

Understanding Trap 3 Raises

The trapezius muscle is generally linked with the trapezoid form, but did you realise it actually has three rows? Trap 3 Raises especially target the third row of your back, which is positioned in the centre of your back. Although this exercise is initially difficult, practising it on a back extension machine delivers an even more severe workout.

Setting Up for Success

Even if you start with only your own body weight, setting up for Trap 3 Raises is straightforward and comfortable. As you gain strength, gradually increase the resistance. Strive for at least 10% of your body weight in each hand, and execute 10 repetitions without bending your elbows.

Proper Form for Trap 3 Raises

To guarantee good form during Trap 3 Raises, follow these guidelines.:

  1. Maintain a comfortable and stable posture when using the back extension machine.
  2. Begin the technique by extending your arms out to the sides, parallel to the floor.
  3. Continue lifting your arms until they are parallel to your body and form a 45-degree angle.
  4. To optimise muscular engagement, avoid bending your elbows during the exercise.
  5. Strive for a smooth and controlled movement, focusing on your centre back muscles.
  6. Like with any workout, viewing yourself from a side angle may assist guarantee appropriate form and technique.

Progression and Weight Recommendation

Increase the resistance progressively over time to optimise the advantages of Trap 3 Raises. Begin with your own body weight and progressively add weight as you gain comfort and strength. Maintain good form and technique for at least 10 repetitions every set.

Benefits of Trap 3 Raises

Adding Trap 3 Raises into your workout regimen has various advantages, including:

  • Developing the often-overlooked middle back muscles
  • Improved upper-body mobility and stability
  • Enhancing posture and alignment in general
  • Assisting with good shoulder function
  • Increasing upper-body injury prevention

Form and Feedback

While today’s linear mobility practise focuses on numerous drills, monitoring your technique and providing feedback isn’t always essential. Nonetheless, you are always welcome to do so, and we urge you to look at yourself from a different perspective for further understanding.

Congrats on finding the great advantages of Trap 3 Raises for strengthening and activating the muscles in your middle back. You may improve your upper body mobility, stability, and general strength by including this exercise into your regimen and using perfect technique. Accept the challenge, advance steadily, and get the benefits of a stronger and more robust upper body. Continue your excellent effort and explore the huge realm of mobility training at mobilityabilityagility.com.

Unlock Your Upper Body Strength with Face Pulls: Improve Mobility and Enhance Posture

Welcome to mobilityabilityagility.com, your one-stop shop for mobility exercises and training. In this post, we will look at the several advantages of face pulls, an efficient upper-body workout. Face pulls are a crucial part of any training regimen, whether you’re an athlete, a fitness enthusiast, or someone wanting to enhance their general mobility. Prepare to learn how this adaptable exercise can help relieve knee and back pain while also improving improved posture.

Face Pulls

Understanding Face Pulls

Face pulls are a dynamic exercise that focuses on the muscles of the upper back, shoulders, and rotator cuffs. You may engage and improve major muscle groups involved in shoulder mobility and stability by doing controlled pulling motions using a cable machine or resistance band.

Why Face Pulls Matter for Mobility Training

As an excellent mobility exercise that may help with common conditions including knee discomfort and back pain Face pulls are it. Face pulls can help rectify imbalances and relieve tension on the knees and lower back by targeting the muscles involved for maintaining appropriate posture. Face pulls, when incorporated into your practise, may improve your overall mobility and movement quality.

Activating the Correct Muscles

It is critical to focus on engaging the right muscles when performing face pulls. It is critical to engage your upper back, rear deltoids, and rotator cuff muscles to get the most out of this exercise. You may target the targeted muscle groups and receive the benefits by using good form and technique.

Proper Technique for Face Pulls

Here’s a step-by-step instruction to successfully doing face pulls:

  1. Attach the cable machine or a resistance band to a strong anchor point at chest level.
  2. Face the machine or anchor point with your feet shoulder-width apart.
  3. Overhand grasp the handles or the band, hands shoulder-width apart.
  4. Step back and stretch your arms to produce tension in the cable or band.
  5. Begin by drawing the handles or the band towards your face while maintaining your elbows high and wide.
  6. At the completion of the exercise, squeeze your shoulder blades together.
  7. Return to the starting position slowly, keeping control throughout the exercise.

Integrating Face Pulls into Your Training Routine

Face pulls should be incorporated into your normal training plan to reap the most benefits. Aim for two to three workouts each week, with three sets of 12 to 15 repetitions each. As you feel more comfortable and stronger, progressively raise the resistance to keep your muscles challenged.

Additional Tips for Success

Here are a few more pointers to help you succeed and optimise the impact of your face pulls:

  • Emphasize good form and technique, with an emphasis on the mind-muscle link.
  • Avoid any jerking or swinging actions throughout the exercise.
  • Change the tension of the cable or resistance band according on your strength and skill.
  • Throughout the workout, keep your breathing steady, inhaling during the eccentric period and exhaling during the concentric phase.

Congrats on finding the amazing advantages of face pulls for your mobility training adventure. You may strengthen your upper body muscles, relieve knee and back discomfort, and improve your overall posture by including this effective workout into your programme. Accept the motivation and inspiration to improve your mobility and performance. Therefore, let’s start tugging with our faces towards a stronger, more mobile, and pain-free future.

for more click here