Skip to content

Knee

Unlock Your Hip Flexor Strength with the Reverse Squat Strap: Power Up Your Lower Body and Achieve Resilient Hips

the Reverse Squat Strap

Welcome to mobilityabilityagility.com, your one-stop shop for mobility exercises and training. In this post, we’ll look over the Reverse Squat Strap’s revolutionary effects and efficacy. You may improve your sprinting and leaping ability, build lower body strength, and create sturdy hips by targeting your hip flexor muscles. Ready to release your entire potential by exploring the magic of the Reverse Squat Strap!

Understanding Hip Flexors and Their Crucial Role

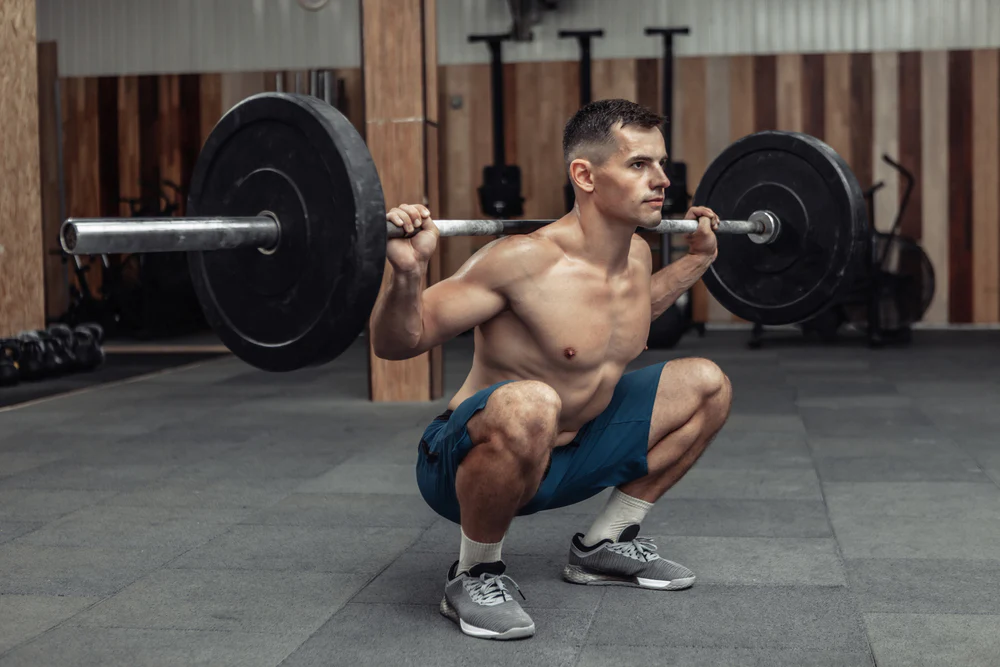
Hip flexors are the muscles that elevate your legs during actions such as running and leaping. Your legs get stronger and more powerful as you build your lower body. This increased leg strength necessitates the use of your hip flexors, making it critical to exercise and strengthen these muscles. The Reverse Squat is a game changer because it focuses and improves your hip flexors, allowing them to assist your whole body strength.

Elevate Your Performance with the Reverse Squat Strap

The Reverse Squat Strap is your secret weapon for developing strong hip flexors and realising your athletic potential. By including reverse squats into your training regimen, you may improve both your speed and strength. The Reverse Squat Strap gives you the support and stability you need to improve your technique, enabling you to concentrate on activating your hip flexors and optimising your lower body power.

Benefits of the Reverse Squat Strap for Hip Flexor Development

  1. Enhanced Hip Flexor Strength: The Reverse Squat Strap especially targets and improves your hip flexor muscles, helping them to match the demands of your lower body strength training.
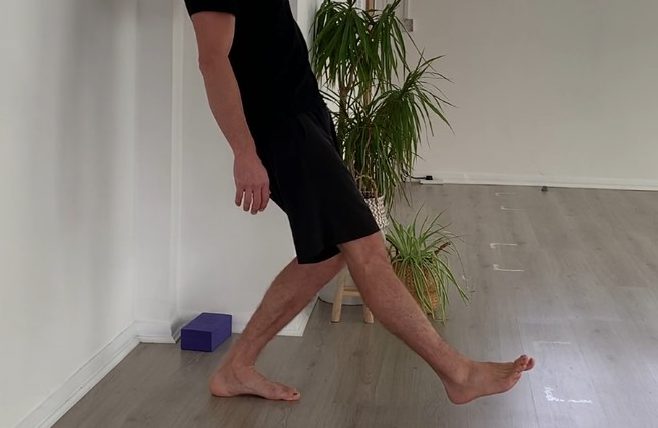
  2. Increased Running and Jumping Performance: You may improve your running pace, vertical jump height, and overall athletic performance by creating tough hip flexors.
  3. Increased Lower Body Power: With the Reverse Squat Strap, you may work different muscle groups in your lower body, resulting in improved power and explosiveness.
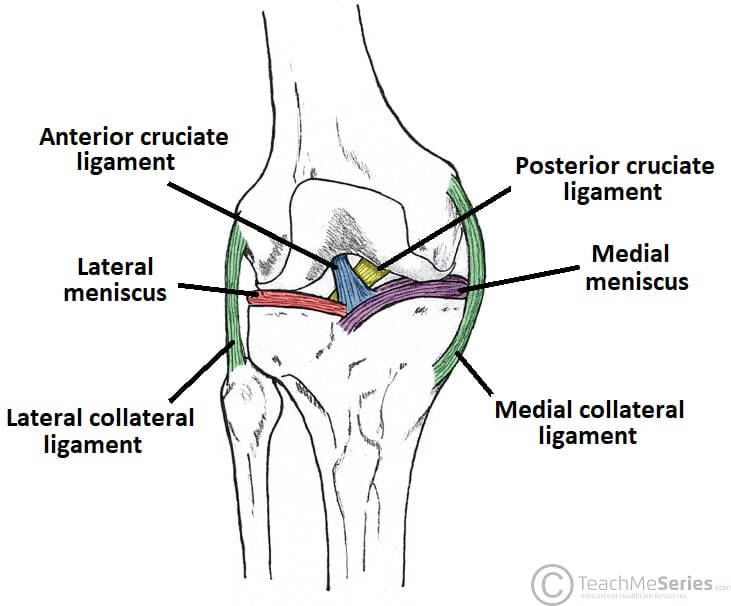
  4. Injury Prevention: Strong hip flexors are essential for maintaining good alignment and lowering the likelihood of injuries including hip discomfort, strains, and imbalances.
  5. Versatile Training Tool: The Reverse Squat Strap allows you to grow gradually, modify difficulty, and customise your exercises.

Incorporating Reverse Squats into Your Training Routine

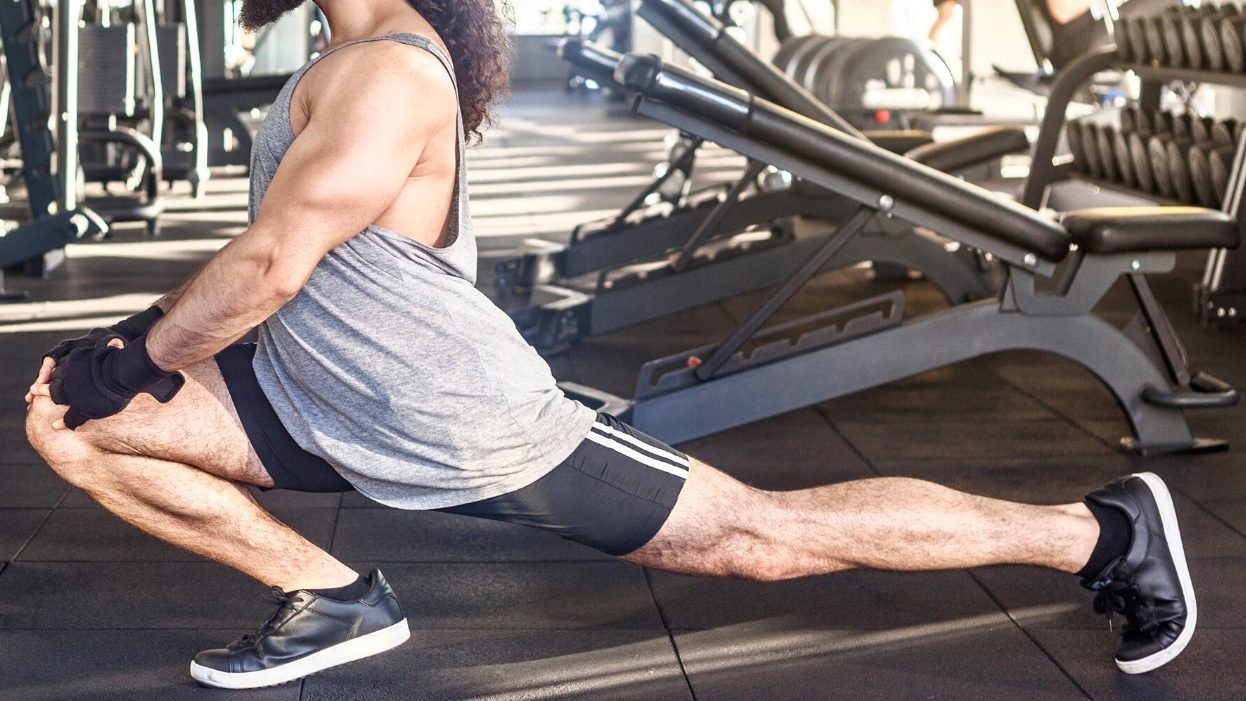
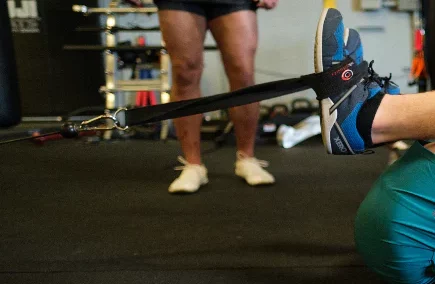
  1. Set up: Provide adequate support and stability by securely attaching the Reverse Squat Strap to a sturdy surface or anchor point.
  2. Form: Stand facing away from the anchor point, wrap the Reverse Squat Strap around your shoulders or upper arms, and squat with appropriate form and hip flexor engagement.
  3. Gradual Progression: with less resistance and progressively raise the challenge as your hip flexor strength develops. Pay attention to your body and make any adjustments.

The Reverse Squat Strap is a revolutionary gadget that targets and improves your hip flexor muscles, resulting in improved running, leaping, and general lower body strength. You can unlock the strength and resilience of your hip flexors by introducing this unique strap into your training programme, pushing your performance to new heights. Adopt the Reverse Squat Strap to increase hip flexor strength and reach athletic brilliance like never before!

for more click here

Elephant Walk: Embrace The Challenge, Crush Your Fears, And Emerge As The Unstoppable Force!

Elephant Walk

You’ve come to the right place if you’re looking for mobility training and exercises: mobilityabilityagility.com. We will explore the amazing advantages of the Elephant Walk. Indeed, a potent exercise that works the hamstrings, calves, hips, and lower back. You can increase flexibility, improve athletic performance, prevent injuries, and encourage healthy ageing by incorporating this exercise into your routine.

The Elephant Walk and Its Mechanics

The Elephant Walk is a dynamic workout in which the knees are bent and extended as the hips are hinged forward. This exercise routine focuses on the hamstrings, calves, hips, and lower back. You may enhance your flexibility and range of motion by activating these muscle groups.

Unlocking the Benefits

  1. Improved Hamstring Flexibility: The Elephant Walk stretches the hamstrings, which are important for motions like running, jumping, and squatting. Improved hamstring flexibility can lead to improved performance and a lower chance of muscle injuries.
  2. Increased Hip Range of Motion: The exercise also develops hip flexibility, which allows for better mobility and stability during daily activities and sports. It can assist to reduce hip stiffness and pain while also improving overall movement quality.
  3. Athletic Performance Improvement: Flexible hamstrings and hips are essential for athletic performance. You may improve your agility, speed, and power by implementing the Elephant Walk into your training programme, providing you an advantage in a variety of sports and hobbies.
  4. Injury Prevention: Tight hamstrings and restricted hip mobility might increase the likelihood of strains and sprains. Regular Elephant Walk practise can minimise muscle imbalances and improve joint alignment, minimising the risk of injury during athletic activity.
  5. Healthy Ageing: Maintaining flexibility becomes increasingly vital as we age. The Elephant Walk promotes greater posture, mobility, and independence in everyday life by counteracting the natural loss of flexibility that comes with age.

Performing the Elephant Walk

  1. Starting Position: To make the exercise more accessible, place your hands on an elevated surface, such as a bench or step. Reduce the height of the surface gradually until you can easily reach the floor.
  2. Proper technique: Stand with your feet hip-width apart, slightly bend your knees, and lean forward at the hips while maintaining your back straight. Your hamstrings and calves should feel a slight stretch.
  3. Controlled Movement: Extend your knees slowly, pulling your hips back and reaching towards the floor. Maintain control during the exercise, concentrating on the stretch in your back legs.
  4. Breathing and Duration: Hold the extended position for 10-30 seconds, breathing deeply and naturally. Repeat the exercise for 3-5 sets, progressively increasing the number of reps.

Safety Precautions and Modifications

  1. Pay Attention to Your Body: Pay attention to your body’s responses and modify the stretch intensity accordingly. To avoid strain or injury, do not push yourself beyond your comfortable range of motion.
  2. If reaching the floor is difficult, use supports like yoga blocks or books to hold your hands at a height that allows for a comfortable stretch.
  3. Individual Considerations: If you have any current knee or lower back concerns, you should check with a healthcare practitioner before undertaking the Elephant Walk to verify it is appropriate for your requirements.

Furthermore, including the Elephant Walk in your mobility training regimen can result in significant gains in hamstring flexibility, hip range of motion, athletic performance, injury avoidance, and healthy ageing. Remember to use good technique, listen to your body, and advance slowly on your flexibility journey. Indeed, Accept the Elephant Walk and get the advantages of improved mobility and general well-being!

For more click here:

mobility ability agility

Couch Stretch: The Ultimate Guide To Unlocking Supple Hips And Taking Control Of Your Mobility!

Couch Stretch

Unleash Your Mobility Potential: Mastering the Couch Stretch for Knee and Back Pain Relief

The Couch Stretch is a particular mobility training exercise. Indeed, It stands out for its potency in treating knee and back pain. Moreover, In order to relieve tightness and imbalances that lead to discomfort, this potent stretch concentrates on the quadriceps and hip flexors. Furthermore, We’ll go through the advantages, appropriate technique, and advice for implementing the Couch Stretch. Additionally you can add it into your mobility training programme in this detailed article. Indeed, prepare to unleash more range of motion and wave goodbye to knee and back discomfort!

Benefits of the Couch Stretch

Improved Hip Flexibility: The Couch Stretch focuses on the tight hip flexor muscles. These develop from extended sitting or repetitive motions. Regular application of this stretch will help you loosen up your hips and get your hip joint back to working properly.
Reduces Knee Pain: By altering biomechanics and putting stress on the knee joint, tight hip flexors can make knee pain worse. The Couch Stretch can relieve knee pain by lengthening and releasing these muscles, which eases the strain on the knees.

Reduces Back Pain: Unbalances in the pelvis brought on by tight hip flexors can result in lower back pain. The Couch Stretch helps relieve back pain by loosening and stretching the hip flexors and restoring proper pelvic alignment.
Corrects Postural Imbalances: Sedentary lifestyles and extended periods of sitting can cause postural imbalances like an anterior pelvic tilt. By correcting these imbalances, the Couch Stretch encourages better posture and lessens the associated discomfort.

Proper Technique for the Couch Stretch

Set up: Place yourself facing away from a solid object, like a couch or a wall. In a lunge position, place one knee on the ground with the top of the foot and shin touching it.

Posture and Alignment:

  • a. Maintain a neutral spine and an upright stance.
  • b. Contract your abdominal muscles to support your spine and pelvis.
  • c. Maintain ankle-knee alignment and refrain from making sharp inward or forward movements with the front knee.
  • d. The back leg should be extended behind you, resting on the floor with the knee and top of the foot.
  • e. Make sure your front foot and the knee that is resting on the ground are equally bearing the weight.

Tips for Effective Couch Stretching

Gradual Progression: As your flexibility increases, start at a comfortable distance from the supporting surface and progressively deepen the stretch over time.
Timeframe and Recurrence: Repeat the stretch two to three times on each side, holding it for 30 to 60 seconds on each side. At least twice or three times a week, try to include the Couch Stretch in your mobility training regimen.
Relaxation and Breathing: During the stretch, concentrate on deep, diaphragmatic breathing to promote relaxation and a greater release of tension in the hip flexors and quads.
Modifications: If placing the knee on the ground causes discomfort, support it with a folded towel or a cushion. A yoga block can also be placed beneath the front foot.

Safety Considerations and Precautions

Listen to Your Body: Recognise your body’s signals and refrain from enduring severe discomfort or pain. Stretching and minor discomfort are typical, but severe pain should be avoided.
Consult a specialist: Before including the Couch Stretch in your routine, speak with a qualified healthcare professional if you have any concerns about your ability to do it safely or if you already have knee or back conditions.

The Couch Stretch is a highly efficient mobility exercise that improves hip flexibility. Additionally, it helps with knee and indeed, back pain, and improves movement in general. Moreover, you can gain the advantages of increased mobility, decreased knee and back pain, and improved general wellbeing by incorporating this stretch into your mobility training regimen and using the right technique and guidelines. Correspondingly, embrace the Couch Stretch as a valuable tool in your journey towards a pain-free, active lifestyle.

Otherwise, for more visit:

mobility ability agility

Nordic Curl: The Ultimate Guide To Building Bulletproof Hamstrings And Achieving Superior Lower Body Strength!

Nordic Curl


Nordic Curl: Unleash Your Strength and Banish Knee Pain

Are you prepared to advance regarding your mobility training and say goodbye to knee pain too? There is no better exercise than the Nordic Curl, additionally, strengthens your hamstrings, glutes, and core while enhancing mobility and easing knee pain. Furthermore, We’ll examine the advantages, appropriate technique, and advice for implementing the Nordic Curl into your mobility training regimen in this detailed tutorial. Additionally, prepare your lower body for strengthening, improve your mobility. moreover, reclaim a life free from knee discomfort!

Understanding the Nordic Curl

The hamstrings, glutes, and core muscles are specifically worked during the effective mobility exercise known as the Nordic Curl. Indeed, using your hamstrings to regulate the fall, you must lower your body from an upright kneeling position to a fully extended position. Additionally, this exercise improves mobility, strengthens the posterior chain, and lessens knee pain.

Benefits of the Nordic Curl

Stronger Hamstrings: The Nordic Curl focuses on the hamstrings in particular, enhancing their strength, stability, and balance across the posterior chain. These muscles can support the knee joint and lower injury risk by being strengthened.
Improved Mobility: The Nordic Curl improves flexibility and mobility in the lower body, enabling better performance in everyday activities and sports endeavours by activating and stretching the hamstrings through controlled eccentric movement.


Reduced Knee Pain: Instability and pain in the knee can be caused by weak hamstrings. As the hamstrings support and stabilise the knee joint, strengthening them with the Nordic Curl can help reduce knee pain.
The Nordic Curl involves constant core activation, which helps to develop the abdominal and lower back muscles. This improves general stability and lowers back pain.

Proper Technique

Starting Position: Kneel down on a cushioned surface with your feet tucked beneath a sturdy anchor, such a spouse or a large item.
Descent: Using your core and glutes, slowly lean forward from your knees while keeping your spine neutral. As you descend, control the motion with your hamstrings until your torso is parallel to the ground.
Ascend: Using your hands or a partner’s help, if necessary, push through your hamstrings and glutes to go back to the starting position.

Tips for Effective Nordic Curl Training

Gradual Progression: As your strength and mobility improves, start with partial or aided Nordic Curls and gradually increase the range of motion and difficulty.
Focus on using your core muscles throughout the workout to maintain stable alignment and good posture.
Breathing: Keep your breaths even and avoid holding them during the motion. As you lower your body, exhale; then, as you raise it back up, inhale.
Equipment and Modifications: You can add a resistance band or partner assistance to make the workout more bearable if you’re just starting out or find it difficult.

Safety Considerations and Precautions

Listen to Your Body: When performing the Nordic Curl, pay close attention to any discomfort or soreness in your body. If you feel a sudden, severe pain, cease what you’re doing right away, and get medical advice.
Proper Warm-up: To get your muscles ready for the Nordic Curl, focus on a comprehensive warm-up that includes dynamic stretches and lower body mobility exercises.
Move Forward at Your Own Pace: Respecting your current level of strength and mobility will help you advance slowly. Injury might result from moving too quickly or hurriedly.


In your pursuit of improved mobility, stronger hamstrings, and lessened knee pain, the Nordic Curl is a game-changer. You can reach a new level of strength, stability, and general well-being by including this exercise into your mobility training regimen and using the right technique and guidelines. Accept the Nordic Curl and give yourself the power to get rid of knee pain, move more easily, and lead an active lifestyle.

Additionally, for more visit:

mobility ability agility Nordic Curl

ATG Squat: Start Fixing Knee Pain Right Now

ATG Squat

Mastering Mobility: The ATG Squat Progression for Stronger and Pain-Free Knees

Mobility training plays a crucial role in maintaining a healthy and functional body. When it comes to lower body mobility and strength, the ATG (Ass to Grass) Squat is an effective and progressive exercise. This comprehensive guide will take you through the benefits, proper technique, and key progressions of the ATG Squat. While, enabling you to improve mobility, alleviate knee pain, and build a resilient lower body.

Understanding the ATG Squat

The ATG Squat is a set of workouts that get harder over time. Moreover, helping you develop better squatting technique and depth. The goal of this phase is to get into a deep squat, when the hips are below parallel with the knees. Moreover, You can improve mobility, build lower body strength, and lessen your risk of knee and back problems by performing these exercises in this order.

Benefits of the ATG Squat

  1. Increased mobility: The muscles and joints in the lower body, especially the hips, knees, and ankles, are the focus of the ATG Squat Progression. You can increase your range of motion and flexibility in these regions by progressively increasing your squat depth.
  2. Strengthening of the lower body: The quadriceps, hamstrings, glutes, and calves are among the key muscle groups that are worked throughout the ATG Squat Progression. You’ll develop lower body strength and power as you move through the variants.
  3. Improved Knee Stability: By completing squats fully, you strengthen the muscles that support your knees, increasing stability and lowering your chance of injury and knee pain.
  4. Core Engagement: To maintain balance and stability while squatting, the core must be engaged. Furthermore, Your core muscles are tested by the ATG Squat Progression, which results in enhanced core strength.
  5. Functional Movement: Sitting down and standing up are two actions that the deep squat position practised in the ATG Squat Progression simulates. It makes it easier for you to execute these tasks and eases the strain on your back and knees.

Proper Technique

  1. Body Position: Ensure that your feet are somewhat broader than shoulder width apart and slightly pointed outward when standing.
  2. Execution: a. Start with a bodyweight squat, concentrating on keeping your spine neutral and pulling your hips back as you descend.
    • b. Gradually deepen your squats, trying to keep your knees from being parallel to the ground while maintaining good form.
    • c. As you advance, you can increase the difficulty by placing a barbell or dumbbell over your shoulders.
    • d. Pay attention to maintaining a raised chest, knees that are parallel to the ground, and balanced weight on your feet.
    • f. To get back to the starting position, press through your heels.
    • f. Repeat as many times as necessary, progressively stepping up the difficulty as you get more acquainted with the exercise.

Key Progressions of the ATG Squat

  1. Goblet squat: While performing the squat, keep a dumbbell or kettlebell near to your chest. This variant encourages appropriate posture and balance.
  2. Barbell Back Squat: You can advance to the barbell back squat if you’ve mastered the bodyweight and goblet squats. With a barbell over your upper back, apply more resistance to your squats.
  3. Overhead squat: Holding a barbell or weight plate overhead while squatting is part of this advanced version known as the overhead squat. Your balance, stability, and core strength are put to the test.

Safety Considerations and Modifications

  1. Squats performed with only your bodyweight are a good place to start. Instead of aiming for depth, concentrate on keeping appropriate form.
  2. Before starting the ATG Squat Progression, speak with a medical expert if you have knee pain or other issues that have existed in the past.
  3. Use a TRX suspension trainer or a stability ball against a wall to modify the exercise and help with balance and stability.


A useful technique for enhancing lower body flexibility, strength, and overall functionality is the ATG Squat Progression. You may build stronger, pain-free knees by progressively increasing your squat depth and incorporating the critical progressions. Always prioritise perfect form. While, paying attention to your body, and move forward at a rate that is appropriate for your skill level. Use the ATG Squat Progression as part of your mobility training programme. Develop a lower body that is more resilient.

For more visit:

mobility ability agility

g

Split Squat Pulse: The Ultimate Guide To Unlocking Explosive Leg Power And Dominating Your Workouts!

Split Squat Pulse
ATG Split Squat

Split Squat Pulse: Lower Body Mobility and Strengthen Your Legs

The ATG Split Squat Pulse is a highly effective workout for increasing lower body mobility and strengthening the legs. This dynamic exercise improves balance and stability while working the quadriceps, hamstrings, glutes, and core muscles. This article will go through the advantages, correct form, and different variants of the ATG Split Squat Pulse, giving you the tools you need to advance your mobility training and develop stronger, pain-free legs.

Understanding the ATG Split Squat Pulse

The split squat exercise is modified in the ATG Split Squat Pulse by including a pulsating movement at the bottom position. The term “Ass to Grass,” abbreviated as “ATG,” refers to the full range of motion attained by bringing the back knee nearly to the ground. For this exercise to be properly performed, your lower body muscles must have stability, control, and flexibility.

Benefits of the ATG Split Squat Pulse

  1. Strengthening of the Legs: The quadriceps, hamstrings, and glutes are among the key muscles targeted by the ATG Split Squat Pulse. You can strengthen and increase the power in your legs by completing this exercise frequently.
  2. Improved Mobility: The ATG Split Squat Pulse’s extensive range of motion contributes to increased flexibility and mobility in the lower body. Increased hip and ankle mobility, which is essential for engaging in daily activities and sports, can result from it.
  3. Core Engagement: The ATG Split Squat Pulse requires core engagement to maintain stability and balance. Your core muscles can become stronger as a result of this workout, improving your posture and overall stability.
  4. Enhanced Balance and Stability: The ATG Split Squat Pulse challenges your balance and stability while also enhancing proprioception and coordination. In particular for elderly persons, this may help lower the risk of falls and injury.
  5. Functional Movement: The ATG Split Squat Pulse is a functional exercise that enhances performance in daily tasks since it imitates actions like walking, running, and climbing stairs.

Proper Technique for the ATG Split Squat Pulse

  1. Starting Position: Standing with your feet shoulder-width apart is the proper starting position. Make sure your knee is directly over your ankle as you advance with one foot.
  2. Execution:
    • a. Lower your back knee towards the floor while keeping your body erect and your abs tight.
    • b. Try not to touch the ground with the rear knee as you bring it as low as you can.
    • c. After lowering yourself to the floor, move your body in a tiny pulsing motion by slowly rising and lowering it.
    • d. Concentrate on pushing yourself back up to the starting position with the front leg.
    • a. Complete the desired number of repetitions on the same leg before transferring to the other leg.
    • f. Complete 10–12 repetitions on each leg, progressively stepping up the difficulty as you go.

Variations and Progressions

  1. Weighted ATG Split Squat Pulse: dumbbells or kettlebells in each hand during the weighted ATG Split Squat Pulse exercise to add resistance and make the exercise more difficult.
  2. Plyometric ATG Split Squat Pulse: Include a hop as you push back up from the split squat posture to increase the exercise’s explosive power. Make sure you land properly to lessen impact on the joints.
  3. Rear Foot Elevated ATG Split Squat Pulse: the back foot on an elevated surface, such as a step or bench, to extend the range of motion and enhance the ATG Split Squat Pulse workout.

Safety Considerations

  1. Keep your front knee in line with your ankle and make sure it doesn’t extend past your toes during the workout.
  2. As your flexibility increases, start with a comfortable range of motion and progressively extend it.
  3. Before introducing the ATG Split Squat Pulse into your routine, speak with a medical expert if you have any pre-existing knee pain or issues.


The ATG Split Squat Pulse is a versatile mobility exercise that targets multiple lower body muscles while enhancing balance and stability. By incorporating this exercise into your mobility training routine, you can strengthen your legs, improve flexibility, and enhance overall functional movement. Start implementing the ATG Split Squat Pulse today and experience the transformative benefits it can bring to your lower body strength and mobility.

For more visit

mobility ability agility

g

ATG Reverse Step Ups: The Ultimate Guide To Unlocking Explosive Leg Power And Unleashing Your Inner Athlete!

Click here to display content from YouTube.
Learn more in YouTube’s privacy policy.

Building Strength and Stability with the Reverse Step-Ups

We’ll be concentrating on the Reverse Step Ups exercise and its variants in this video. The Patrick step up is the first variant we’ll talk about. Targeting the VMO (Vastus Medialis Obliquus), the medial side of the quadriceps, this exercise is made to increase calf length and ankle stability. The quads can help to support healthy knees and hips. Let’s examine each step on how to accurately execute the Patrick step-up.

Start Position and Foot Placement

Place yourself in front of a step or a platform to start the activity. The objective is to keep your toes off the ground and touch your heel to the platform in front of you. In this beginning position, the knee can provide the most force and the quadriceps can be fully engaged. For good form, make sure your shoulder, kneecap, and heel are all in line with one another.

Driving Force and Hip Engagement

Pay attention to pushing force through the knee as you drive your heel into the platform and feel the quadriceps contract. Allow your hips to move forward at the same time, keeping your body’s alignment from shoulder to knee. For improving stability and maximising the benefits of the exercise, this hip engagement is essential.

Repetitions and Progression

On each leg, complete 10 repetitions of the Patrick step-up, paying attention to controlled motion and correct form. You can progressively introduce new challenges as you gain experience. Dumbbells can be added at first for more resistance, or you can start by putting weight on your back. The final objective is to be able to do 10 repetitions of each leg using only your body weight. Eventually, you can advance by adding two 20-kilogram plates or increasing the platform’s height by around six inches.

Importance of Pain-Free Execution

During this workout, it’s important to pay attention to your body and refrain from pushing through discomfort. It’s critical to adjust the height or weight to a point where you can complete the action without experiencing pain if you’re in agony. You can advance safely and successfully by gradually gaining strength and capacity.

Enhancing Stability and Force Production

Focus on establishing stability from the ground up in order to maximise the advantages of the reverse step-up. Start by making sure that your feet are securely planted so that you have a strong foundation. Next, actively press your big toe into the ground while concentrating on engaging your quadriceps. Over time, this conscious effort to produce stability and force will lead to healthier knees and hips.

Balancing Strength Continuum

It is crucial to address both ends of the spectrum in order to create a strength continuum that is well-rounded. Including variations with various weights and heights is necessary. You can either retain a lower height while increasing your weight or the opposite. You can target all facets of strength growth and have a balanced approach to your fitness journey by varying your exercise.

Reverse Step Ups

The reverse step-up is a useful exercise for increasing strength, stability, and the health of your knees and hips, especially the Patrick step-up form. By mastering this exercise, you can go to more difficult varieties and keep improving your general level of physical fitness. As your power and stability rise, keep in mind to prioritise perfect form, pay attention to your body, and progressively raise the level of difficulty. To benefit from the reverse step-up and reach your maximum potential, incorporate it into your training regimen.

For more go to:

Reverse Step Ups

g

Reverse Step Up: Overcoming Doubt, Building Strength, And Embracing The New You!

Reverse Step Up

Boost Your Mobility and Strengthen Your Legs with the Reverse Step Up

To improve general mobility and develop lower body strength, it’s critical to include effective mobility exercises in your training regimen. The Reverse Step Up is one such workout that demands your attention. This adaptable workout stimulates your legs’ muscles, especially the quadriceps, hamstrings, and glutes, while enhancing stability and balance. We will examine the advantages, proper execution, and variations of the reverse step up in this post, giving you the tools to advance your mobility training and develop stronger, pain-free legs.

Understanding the Reverse Step Up

A complex exercise that mainly works the lower body muscles is the reverse step up. It entails using one leg at a time and pressing through the heel to go onto an elevated platform or step. This exercise is a great choice for enhancing everyday mobility and developing lower body strength since it simulates useful movements like stepping up onto higher surfaces and ascending stairs.

Benefits of the Reverse Step Up

  1. Leg Strength and Muscle Activation: The quadriceps, hamstrings, and glutes are excellent targets for the Reverse Step Up. You can make your legs stronger and your lower body more powerful by using these muscles.
  2. Improved Balance and Stability: The Reverse Step Up exercises the core muscles and improves total body control by requiring balance and stability. Increasing these factors can improve your daily activities and lower the chance of falls or injury.
  3. Increased Joint Health: Mobility exercises, such as the Reverse Step Up, can assist increase joint stability and encourage wholesome movement patterns. In turn, this can lessen knee pain and lower the chance of knee injury.
  4. Functional Fitness: The Reverse Step Up is a functional workout that leads to better performance in everyday tasks and sports since it closely resembles real-life movements.

Section 3: Proper Technique for the Reverse Step Up

  1. Step: with your feet hip-width apart or stand facing an elevated platform for the setup.
  2. Execution: 
    • a. Start by shifting your weight to one leg, then lift the opposite leg with the bent knee.
    • b. Carefully place your weight on the heel as you slowly lower your elevated foot onto the platform.
    • c. Elevate your body onto the platform by pushing through the heel of the lifted foot.
    • c. Take a short break at the peak, making sure your hips and knees are fully extended.
    • e. Slowly and carefully lower yourself back to the starting position.
    • f. Carry out the motion with the other leg.
    • b. Aim for 10 to 15 reps on each leg, progressively stepping up the difficulty as you go.

Variations for Progression

  1. Weighted Reverse Step Up: To add resistance and make the workout more difficult, hold dumbbells or kettlebells in each hand as you complete the exercise.
  2. Reverse Step Up Laterally: To perform the Reverse Step Up laterally, step one foot onto the platform, and then laterally raise the other foot out to the side.
  3. Single-Leg Reverse Step Up: Reverse step-up with one leg only for a more difficult workout: Once you have mastered the basic Reverse Step Up, move on to doing the exercise with only one leg.

Safety Considerations and Tips

  1. As you build strength and confidence, start with a low platform or step and progressively increase the height.
  2. Throughout the exercise, make sure to maintain perfect form by keeping your knee in line with your toes and your core engaged for stability.
  3. Before implementing the Reverse Step Up into your routine, speak with a healthcare provider if you have knee discomfort or any other pre-existing knee issues.


The Reverse Step Up is a very efficient mobility exercise that strengthens the legs while also enhancing stability and balance. You can improve knee pain relief, increase lower body strength, and increase general mobility by incorporating this exercise into your mobility training. Start implementing the reverse step up into your exercises to start seeing changes in your leg strength and level of functional fitness.

for more visit:

mobility ability agility

g

How To Reverse Knee Pain

4 Exercises to Improve Knee Mobility

Click here to display content from YouTube.
Learn more in YouTube’s privacy policy.

Three Ways to Reverse Knee Pain: A Simple Progression and Regression Approach

We will look at three ways to treat knee pain in this video. It’s crucial to remember that these tactics represent a range of possibilities that can be adjusted to your particular requirements rather than a one-size-fits-all approach. You can find the best position for yourself and get rid of knee discomfort by using the progression and regression approach created by trainer Ben Patrick. We’ll also go over some important knee health principles during this conversation.

Step Down Exercise

We’ll start with a step-down exercise to get things going. People who have worn-out knees or those who are experiencing severe knee discomfort should try this workout. You can ease the strain on your knees by using a support object, such as a block or step. The workout is moving your weight forward before reversing direction. It’s crucial to keep your composure and balance while moving. The vastus medialis obliquus (VMO), a quadriceps muscle that aids in knee stabilisation, is activated during this exercise. Increasing the repetitions or slowing down the movement will change the difficulty level.

Higher Step Down

The moment has come to move on to the next level if you find the original step-down exercise to be too simple. In this exercise, the support item is removed, and the movement is emphasised by intensifying it. Making fists causes your core muscles to contract, strengthening them. Reversing the typical knee movement that generates pain is the goal. We move backwards instead of forward, which strengthens the knee differently. As you let the knee to pass past your toes, keep your balance and step onto your toes. You can always go back to the previous stage and do extra reps if this exercise is too unpleasant.

Adding Weight

It’s time to add new tasks once you feel comfortable with the prior exercises. We retain the same height as the previous step-down exercise but add weight to the back during this exercise. By doing this, we increase grounding and quadriceps engagement, both of which are crucial for strong, stable knees. The movement pattern stays the same: gently advance while emphasising your weight on your toes, then quickly turn around to face the discomfort. Remind yourself to maintain control while progressively raising the level of challenge.

The Importance of Progression and Regression

This method differs from others in that it emphasises progression and regression. Indeed this approach permits a gradual progression based on your skills, unlike many rehabilitation programmes that offer a single exercise without taking individual needs into account. You can always switch to the previous exercise, lighten the weight, or give yourself a little help if an exercise becomes too difficult. Finding your sweet spot will enable you to progressively increase strength while retaining results.

Building Strength

After your knee discomfort has been properly managed, you should turn your attention to strengthening your knee. You can progressively become used to the exercises by starting with simple motions. Keep the knee from bending too much or putting too much weight on it. Start with a support object to help you, then as you get stronger, indeed stop using it and switch to a higher platform. To make sure you are adequately strengthening the knee, decline slowly and reverse out of the activity.

How To Reverse Knee Pain

Using a progression and regression strategy that takes into account each person’s demands, knee discomfort can be reversed too. You may strengthen your knees and maintain a healthy knee joint by performing the step-down exercises, progressively raising the level of effort, and adding weight. It’s crucial to identify your sweet spot, carry out the exercises properly, also an advance at a rate that works for you. Remember that this method allows for alterations and adjustments, ensuring that you maintain a strong knee and avoid unneeded pain.

Visit: mobilityabilityagility.com

YT

I Love The ATG Split Squat: Boost Mobility And Strengthen Your Lower Body

ATG Split Squat

When it comes to mobility training and building a strong lower body. Few exercises can match the effectiveness and versatility of the ATG split squat (Ass-to-Grass). Whether you’re an athlete aiming to better your performance, a person looking for knee pain relief, or simply want to increase your overall mobility, including ATG split squats into your regimen can produce spectacular results. This article will go through the advantages, method, and variants of this strong exercise. Assisting you in taking your mobility training to the next level.

Understanding the ATG Split Squat

The ATG split squat, also known as the Bulgarian split squat, is a lower-body unilateral exercise. It works the quadriceps, hamstrings, glutes, and hip stabilisers. It entails taking one step forward onto an elevated surface while retaining the other foot behind, producing a split stance. This exercise tests your balance, stability, and flexibility, making it a fantastic mobility training exercise.

Unlocking the Benefits

Enhanced Mobility: Deep knee flexion is required for the ATG split squat, which promotes improved mobility in the hip, knee, and ankle joints. By completing this exercise on a regular basis, indeed, you will increase your range of motion and flexibility.
Lower Body Strength: The ATG split squat increases lower body strength and power by engaging numerous muscle groups at the same time. It works the quads, hamstrings, glutes, and even the core, assisting in the development of a well-rounded lower body.

Improved Balance and Stability: The ATG split squat’s unilateral nature tests your balance and stability, activating the hip and ankle stabilising muscles. This results in better functional movement and a lower chance of injury.
Knee Pain Relief: When done correctly, the ATG split squat can help relieve knee pain, contrary to popular thought. Indeed This exercise effectively treats and prevents knee discomfort by strengthening the surrounding muscles and increasing joint stability.

Mastering the Technique

Starting Position: Place one foot forward onto an elevated platform. You can uses a step or bench, with your feet hip-width apart. Maintain an erect posture while engaging your core.
Descending Phase: Bend both knees, making sure the front knee tracks over the ankle and does not cave inward. Indeed Maintain control during the action by bringing your back knee close to the ground without touching it.
Ascending Phase: Drive yourself back up to the starting position by pushing through the heel of your front foot. Maintain core stability and tightness throughout the workout.
Repeat: Repeat the movement on the opposite side for the required amount of repetitions.

Variations for Progression

Weighted ATG Split Squat: To enhance resistance and challenge, use dumbbells or a barbell on your shoulders.
Rear-Foot Elevated ATG Split Squat: Elevate your back foot on a step or bench to intensify the stretch and engage your glutes and hamstrings even more.
Isometric Hold: Pause for a few seconds at the bottom of the exercise to lengthen the period under stress and develop your lower body even more.
Plyometric ATG Split Squat: Incorporate a jump into the exercise, lifting oneself off the ground explosively and switching legs mid-air. This version increases power while also including a cardiovascular component to the exercise.

Safety Considerations and Modifications

Start with Bodyweight: If you’re new to the ATG split squat or have mobility limitations, begin with bodyweight to establish proper form and gradually increase the difficulty.
Supportive Equipment: Use a stable surface or hold onto a support (such as a wall or railing) if you need assistance with balance.
Adjusting Height: Modify the height of the elevated surface based on your comfort level and ability, gradually progressing as you gain strength and mobility.

The ATG Split Squat

The ATG split squat is a highly effective exercise for mobility training. It helps with developing lower body strength, and relieving knee pain. By include this exercise in your regimen, you will not only improve your flexibility and mobility, but you will also develop a strong and resilient lower body. Remember to focus on appropriate form, advance gently, and listen to your body. Begin receiving the benefits of the ATG split squat immediately and transform your mobility training.


For more visit:

mobilityabilityagility.com

or here