Skip to content

Mobility

Split Squat Pulse: The Ultimate Guide To Unlocking Explosive Leg Power And Dominating Your Workouts!

Split Squat Pulse
ATG Split Squat

Split Squat Pulse: Lower Body Mobility and Strengthen Your Legs

The ATG Split Squat Pulse is a highly effective workout for increasing lower body mobility and strengthening the legs. This dynamic exercise improves balance and stability while working the quadriceps, hamstrings, glutes, and core muscles. This article will go through the advantages, correct form, and different variants of the ATG Split Squat Pulse, giving you the tools you need to advance your mobility training and develop stronger, pain-free legs.

Understanding the ATG Split Squat Pulse

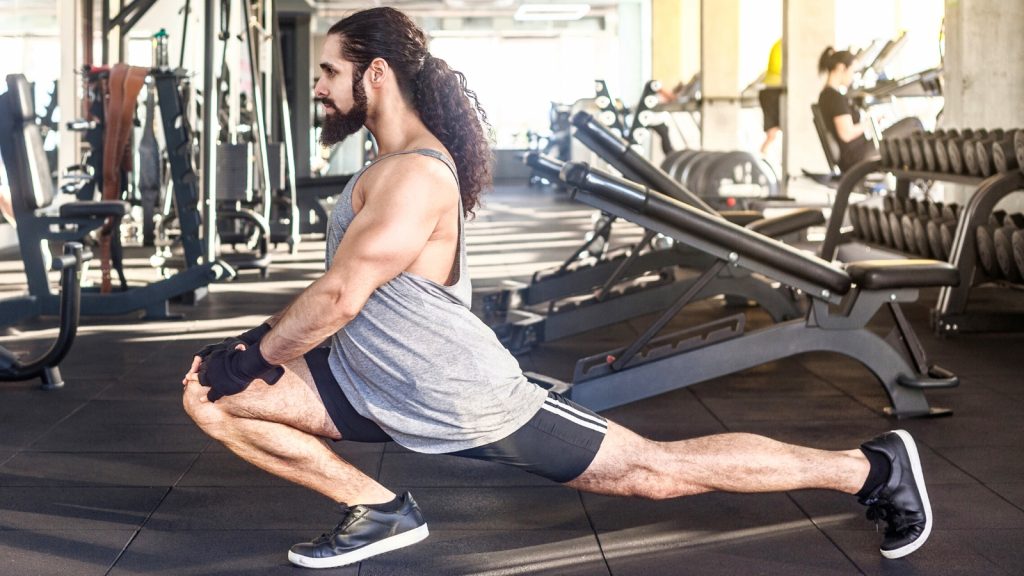
The split squat exercise is modified in the ATG Split Squat Pulse by including a pulsating movement at the bottom position. The term “Ass to Grass,” abbreviated as “ATG,” refers to the full range of motion attained by bringing the back knee nearly to the ground. For this exercise to be properly performed, your lower body muscles must have stability, control, and flexibility.

Benefits of the ATG Split Squat Pulse

  1. Strengthening of the Legs: The quadriceps, hamstrings, and glutes are among the key muscles targeted by the ATG Split Squat Pulse. You can strengthen and increase the power in your legs by completing this exercise frequently.
  2. Improved Mobility: The ATG Split Squat Pulse’s extensive range of motion contributes to increased flexibility and mobility in the lower body. Increased hip and ankle mobility, which is essential for engaging in daily activities and sports, can result from it.
  3. Core Engagement: The ATG Split Squat Pulse requires core engagement to maintain stability and balance. Your core muscles can become stronger as a result of this workout, improving your posture and overall stability.
  4. Enhanced Balance and Stability: The ATG Split Squat Pulse challenges your balance and stability while also enhancing proprioception and coordination. In particular for elderly persons, this may help lower the risk of falls and injury.
  5. Functional Movement: The ATG Split Squat Pulse is a functional exercise that enhances performance in daily tasks since it imitates actions like walking, running, and climbing stairs.

Proper Technique for the ATG Split Squat Pulse

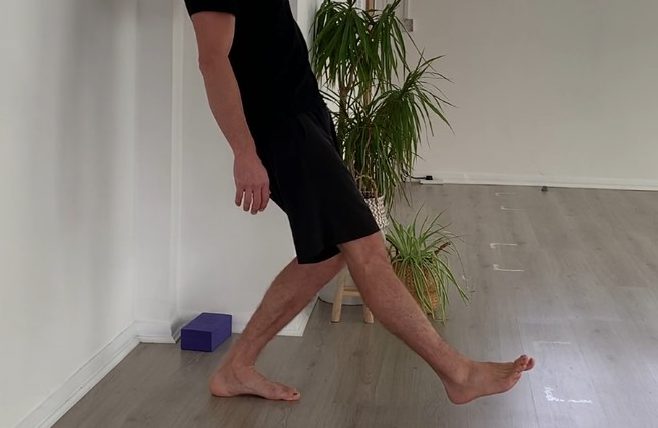
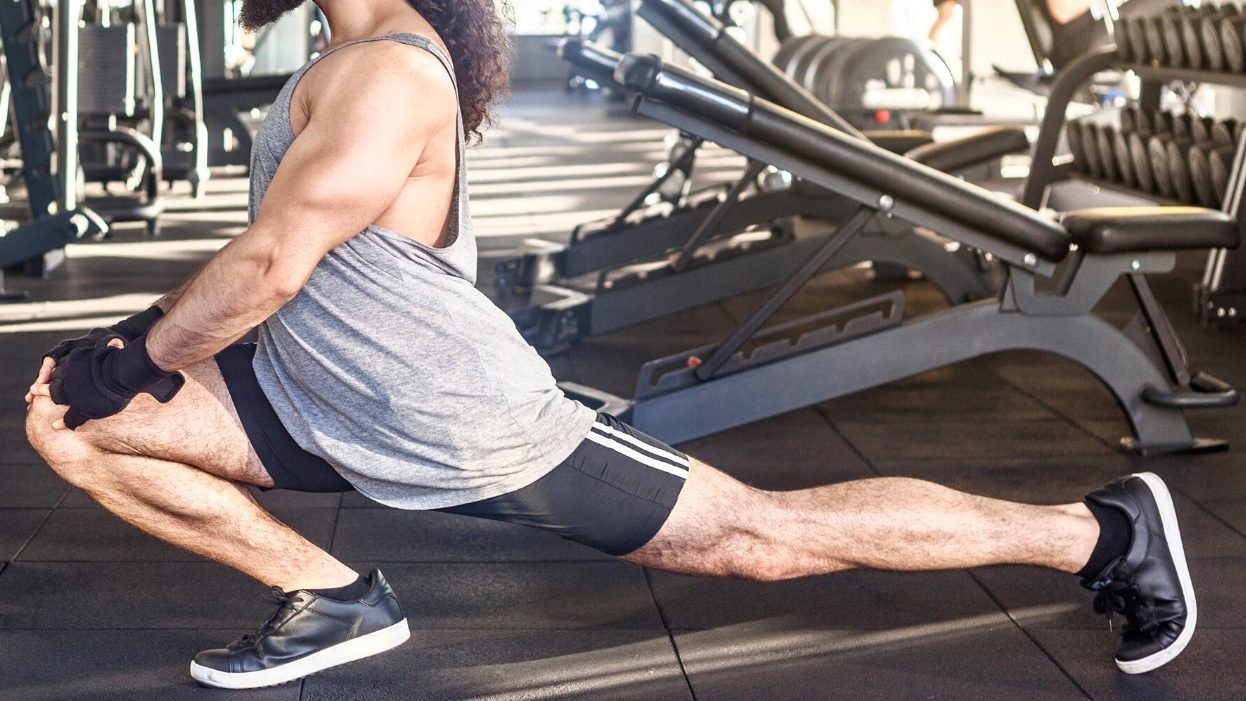
  1. Starting Position: Standing with your feet shoulder-width apart is the proper starting position. Make sure your knee is directly over your ankle as you advance with one foot.
  2. Execution:
    • a. Lower your back knee towards the floor while keeping your body erect and your abs tight.
    • b. Try not to touch the ground with the rear knee as you bring it as low as you can.
    • c. After lowering yourself to the floor, move your body in a tiny pulsing motion by slowly rising and lowering it.
    • d. Concentrate on pushing yourself back up to the starting position with the front leg.
    • a. Complete the desired number of repetitions on the same leg before transferring to the other leg.
    • f. Complete 10–12 repetitions on each leg, progressively stepping up the difficulty as you go.

Variations and Progressions

  1. Weighted ATG Split Squat Pulse: dumbbells or kettlebells in each hand during the weighted ATG Split Squat Pulse exercise to add resistance and make the exercise more difficult.
  2. Plyometric ATG Split Squat Pulse: Include a hop as you push back up from the split squat posture to increase the exercise’s explosive power. Make sure you land properly to lessen impact on the joints.
  3. Rear Foot Elevated ATG Split Squat Pulse: the back foot on an elevated surface, such as a step or bench, to extend the range of motion and enhance the ATG Split Squat Pulse workout.

Safety Considerations

  1. Keep your front knee in line with your ankle and make sure it doesn’t extend past your toes during the workout.
  2. As your flexibility increases, start with a comfortable range of motion and progressively extend it.
  3. Before introducing the ATG Split Squat Pulse into your routine, speak with a medical expert if you have any pre-existing knee pain or issues.


The ATG Split Squat Pulse is a versatile mobility exercise that targets multiple lower body muscles while enhancing balance and stability. By incorporating this exercise into your mobility training routine, you can strengthen your legs, improve flexibility, and enhance overall functional movement. Start implementing the ATG Split Squat Pulse today and experience the transformative benefits it can bring to your lower body strength and mobility.

For more visit

mobility ability agility

g

ATG Reverse Step Ups: The Ultimate Guide To Unlocking Explosive Leg Power And Unleashing Your Inner Athlete!

Click here to display content from YouTube.
Learn more in YouTube’s privacy policy.

Building Strength and Stability with the Reverse Step-Ups

We’ll be concentrating on the Reverse Step Ups exercise and its variants in this video. The Patrick step up is the first variant we’ll talk about. Targeting the VMO (Vastus Medialis Obliquus), the medial side of the quadriceps, this exercise is made to increase calf length and ankle stability. The quads can help to support healthy knees and hips. Let’s examine each step on how to accurately execute the Patrick step-up.

Start Position and Foot Placement

Place yourself in front of a step or a platform to start the activity. The objective is to keep your toes off the ground and touch your heel to the platform in front of you. In this beginning position, the knee can provide the most force and the quadriceps can be fully engaged. For good form, make sure your shoulder, kneecap, and heel are all in line with one another.

Driving Force and Hip Engagement

Pay attention to pushing force through the knee as you drive your heel into the platform and feel the quadriceps contract. Allow your hips to move forward at the same time, keeping your body’s alignment from shoulder to knee. For improving stability and maximising the benefits of the exercise, this hip engagement is essential.

Repetitions and Progression

On each leg, complete 10 repetitions of the Patrick step-up, paying attention to controlled motion and correct form. You can progressively introduce new challenges as you gain experience. Dumbbells can be added at first for more resistance, or you can start by putting weight on your back. The final objective is to be able to do 10 repetitions of each leg using only your body weight. Eventually, you can advance by adding two 20-kilogram plates or increasing the platform’s height by around six inches.

Importance of Pain-Free Execution

During this workout, it’s important to pay attention to your body and refrain from pushing through discomfort. It’s critical to adjust the height or weight to a point where you can complete the action without experiencing pain if you’re in agony. You can advance safely and successfully by gradually gaining strength and capacity.

Enhancing Stability and Force Production

Focus on establishing stability from the ground up in order to maximise the advantages of the reverse step-up. Start by making sure that your feet are securely planted so that you have a strong foundation. Next, actively press your big toe into the ground while concentrating on engaging your quadriceps. Over time, this conscious effort to produce stability and force will lead to healthier knees and hips.

Balancing Strength Continuum

It is crucial to address both ends of the spectrum in order to create a strength continuum that is well-rounded. Including variations with various weights and heights is necessary. You can either retain a lower height while increasing your weight or the opposite. You can target all facets of strength growth and have a balanced approach to your fitness journey by varying your exercise.

Reverse Step Ups

The reverse step-up is a useful exercise for increasing strength, stability, and the health of your knees and hips, especially the Patrick step-up form. By mastering this exercise, you can go to more difficult varieties and keep improving your general level of physical fitness. As your power and stability rise, keep in mind to prioritise perfect form, pay attention to your body, and progressively raise the level of difficulty. To benefit from the reverse step-up and reach your maximum potential, incorporate it into your training regimen.

For more go to:

Reverse Step Ups

g

Reverse Step Up: Overcoming Doubt, Building Strength, And Embracing The New You!

Reverse Step Up

Boost Your Mobility and Strengthen Your Legs with the Reverse Step Up

To improve general mobility and develop lower body strength, it’s critical to include effective mobility exercises in your training regimen. The Reverse Step Up is one such workout that demands your attention. This adaptable workout stimulates your legs’ muscles, especially the quadriceps, hamstrings, and glutes, while enhancing stability and balance. We will examine the advantages, proper execution, and variations of the reverse step up in this post, giving you the tools to advance your mobility training and develop stronger, pain-free legs.

Understanding the Reverse Step Up

A complex exercise that mainly works the lower body muscles is the reverse step up. It entails using one leg at a time and pressing through the heel to go onto an elevated platform or step. This exercise is a great choice for enhancing everyday mobility and developing lower body strength since it simulates useful movements like stepping up onto higher surfaces and ascending stairs.

Benefits of the Reverse Step Up

  1. Leg Strength and Muscle Activation: The quadriceps, hamstrings, and glutes are excellent targets for the Reverse Step Up. You can make your legs stronger and your lower body more powerful by using these muscles.
  2. Improved Balance and Stability: The Reverse Step Up exercises the core muscles and improves total body control by requiring balance and stability. Increasing these factors can improve your daily activities and lower the chance of falls or injury.
  3. Increased Joint Health: Mobility exercises, such as the Reverse Step Up, can assist increase joint stability and encourage wholesome movement patterns. In turn, this can lessen knee pain and lower the chance of knee injury.
  4. Functional Fitness: The Reverse Step Up is a functional workout that leads to better performance in everyday tasks and sports since it closely resembles real-life movements.

Section 3: Proper Technique for the Reverse Step Up

  1. Step: with your feet hip-width apart or stand facing an elevated platform for the setup.
  2. Execution: 
    • a. Start by shifting your weight to one leg, then lift the opposite leg with the bent knee.
    • b. Carefully place your weight on the heel as you slowly lower your elevated foot onto the platform.
    • c. Elevate your body onto the platform by pushing through the heel of the lifted foot.
    • c. Take a short break at the peak, making sure your hips and knees are fully extended.
    • e. Slowly and carefully lower yourself back to the starting position.
    • f. Carry out the motion with the other leg.
    • b. Aim for 10 to 15 reps on each leg, progressively stepping up the difficulty as you go.

Variations for Progression

  1. Weighted Reverse Step Up: To add resistance and make the workout more difficult, hold dumbbells or kettlebells in each hand as you complete the exercise.
  2. Reverse Step Up Laterally: To perform the Reverse Step Up laterally, step one foot onto the platform, and then laterally raise the other foot out to the side.
  3. Single-Leg Reverse Step Up: Reverse step-up with one leg only for a more difficult workout: Once you have mastered the basic Reverse Step Up, move on to doing the exercise with only one leg.

Safety Considerations and Tips

  1. As you build strength and confidence, start with a low platform or step and progressively increase the height.
  2. Throughout the exercise, make sure to maintain perfect form by keeping your knee in line with your toes and your core engaged for stability.
  3. Before implementing the Reverse Step Up into your routine, speak with a healthcare provider if you have knee discomfort or any other pre-existing knee issues.


The Reverse Step Up is a very efficient mobility exercise that strengthens the legs while also enhancing stability and balance. You can improve knee pain relief, increase lower body strength, and increase general mobility by incorporating this exercise into your mobility training. Start implementing the reverse step up into your exercises to start seeing changes in your leg strength and level of functional fitness.

for more visit:

mobility ability agility

g

Tibialis Raise: Strengthen Your Ankles and Enhance Mobility

tibialis-raise
tibialis-raise
Tibialis Raise: Strengthen Your Ankles and Enhance Mobility

The value of ankle flexibility and strength cannot be understated when it comes to mobility training. Targeting the tibialis anterior muscle in the front of the lower leg, the ATG Tibialis Raise is a less popular but incredibly powerful exercise. You can increase overall mobility, reduce injuries, and improve ankle stability by including this exercise in your programme. We’ll examine the advantages, method, and variants of the ATG Tibialis Raise in this post, giving you the tools you need to advance your mobility training.

Understanding the ATG Tibialis Raise

The tibialis anterior muscle, which is essential for ankle dorsiflexion, can be strengthened by the mobility exercise known as the ATG Tibialis Raise. This exercise strengthens and stabilises the ankle joint by focusing on the front of your lower leg. You may strengthen lower body mobility, reduce ankle injuries, and improve balance by including the ATG Tibialis Raise into your regimen.

Benefits of the ATG Tibialis Raise

  1. Improved Ankle Stability: The ATG Tibialis Raise targets the tibialis anterior muscle, which is in charge of dorsiflexion, with particularity. By considerably increasing ankle stability, strengthening this muscle helps lower the incidence of sprains and other ankle-related injuries.
  2. Improved Balance and Proprioception: The ATG Tibialis Raise strengthens your body’s proprioception, which is your capacity to perceive and regulate movement, by concentrating on ankle strength and stability. With more mobility overall, other activities benefit from your better balance.
  3. Injury prevention: Weak ankles are more likely to sprains and strains, especially while engaging in sports or physical activity. The ATG Tibialis Raise fortifies the muscles that surround the ankle, acting as a safeguard against potential harm.
  4. Improved flexibility and range of motion: Proper walking, running, and squatting mechanics depend on the dorsiflexion of the ankle. You may extend your range of motion and improve ankle flexibility, which will result in more effective movement patterns, by completing the ATG Tibialis Raise on a daily basis.

Mastering the Technique

Starting Position: Sit on a bench or chair with your knees bent at a 90-degree angle and your feet flat on the floor.
Execution:

a. Wrap a resistance band over each of your feet in a “X” pattern.
b. Flex your feet by bringing your toes towards your shins while struggling with the band’s resistance.
c. Concentrate on the tibialis anterior muscle as you hold the contraction for a few seconds.
c. After the required number of repetitions, slowly return to the starting position.

Variations for Progression

  1. Eccentric Tibialis Raise: Emphasising the eccentric portion of the exercise, slowly lower your toes back to the starting position. With this variation, the muscle is put under tension for a longer period of time.
  2. Weighted Tibialis Raise: To add resistance and make the exercise more difficult, stand with a light dumbbell or weight plate on each foot.
  3. Tibialis raise while standing: Use a chair or a wall for balance assistance while performing the exercise. This variant ups the difficulty by using more muscles in the lower leg.

Safety Considerations and Modifications

  1. Start with Low Resistance: If this is your first time doing this exercise, start with a low resistance band or none at all. As you get stronger and more adept at the movement, gradually up the intensity.
  2. Emphasis on Correct Form: Throughout the workout, keep your alignment and posture correct. Avoid overusing other muscles by ensuring that the movement comes from the tibialis anterior muscle.
  3. Consult a specialist: It is advised to seek personalised advice from a trained healthcare or fitness professional if you have a history of ankle issues or have concerns about completing the ATG Tibialis Raise.

Strengthen Your Ankles and Enhance Mobility with the ATG Tibialis Raise

Don’t undervalue the value of ankle flexibility and strength in your entire mobility training programme. The ATG Tibialis Raise is a quick and easy approach to build tibialis anterior strength and improve ankle stability. You can increase mobility in your regular tasks, prevent injuries, and enhance balance by including this exercise into your routine. Start incorporating the ATG Tibialis Raise into your workouts to start seeing the dramatic improvements in your mobility and ankle health.

for more visit:

mobilityabilityagility.com

G

tibialis-raise
tibialis-raise

I Love The ATG Split Squat: Boost Mobility And Strengthen Your Lower Body

ATG Split Squat

When it comes to mobility training and building a strong lower body. Few exercises can match the effectiveness and versatility of the ATG split squat (Ass-to-Grass). Whether you’re an athlete aiming to better your performance, a person looking for knee pain relief, or simply want to increase your overall mobility, including ATG split squats into your regimen can produce spectacular results. This article will go through the advantages, method, and variants of this strong exercise. Assisting you in taking your mobility training to the next level.

Understanding the ATG Split Squat

The ATG split squat, also known as the Bulgarian split squat, is a lower-body unilateral exercise. It works the quadriceps, hamstrings, glutes, and hip stabilisers. It entails taking one step forward onto an elevated surface while retaining the other foot behind, producing a split stance. This exercise tests your balance, stability, and flexibility, making it a fantastic mobility training exercise.

Unlocking the Benefits

Enhanced Mobility: Deep knee flexion is required for the ATG split squat, which promotes improved mobility in the hip, knee, and ankle joints. By completing this exercise on a regular basis, indeed, you will increase your range of motion and flexibility.
Lower Body Strength: The ATG split squat increases lower body strength and power by engaging numerous muscle groups at the same time. It works the quads, hamstrings, glutes, and even the core, assisting in the development of a well-rounded lower body.

Improved Balance and Stability: The ATG split squat’s unilateral nature tests your balance and stability, activating the hip and ankle stabilising muscles. This results in better functional movement and a lower chance of injury.
Knee Pain Relief: When done correctly, the ATG split squat can help relieve knee pain, contrary to popular thought. Indeed This exercise effectively treats and prevents knee discomfort by strengthening the surrounding muscles and increasing joint stability.

Mastering the Technique

Starting Position: Place one foot forward onto an elevated platform. You can uses a step or bench, with your feet hip-width apart. Maintain an erect posture while engaging your core.
Descending Phase: Bend both knees, making sure the front knee tracks over the ankle and does not cave inward. Indeed Maintain control during the action by bringing your back knee close to the ground without touching it.
Ascending Phase: Drive yourself back up to the starting position by pushing through the heel of your front foot. Maintain core stability and tightness throughout the workout.
Repeat: Repeat the movement on the opposite side for the required amount of repetitions.

Variations for Progression

Weighted ATG Split Squat: To enhance resistance and challenge, use dumbbells or a barbell on your shoulders.
Rear-Foot Elevated ATG Split Squat: Elevate your back foot on a step or bench to intensify the stretch and engage your glutes and hamstrings even more.
Isometric Hold: Pause for a few seconds at the bottom of the exercise to lengthen the period under stress and develop your lower body even more.
Plyometric ATG Split Squat: Incorporate a jump into the exercise, lifting oneself off the ground explosively and switching legs mid-air. This version increases power while also including a cardiovascular component to the exercise.

Safety Considerations and Modifications

Start with Bodyweight: If you’re new to the ATG split squat or have mobility limitations, begin with bodyweight to establish proper form and gradually increase the difficulty.
Supportive Equipment: Use a stable surface or hold onto a support (such as a wall or railing) if you need assistance with balance.
Adjusting Height: Modify the height of the elevated surface based on your comfort level and ability, gradually progressing as you gain strength and mobility.

The ATG Split Squat

The ATG split squat is a highly effective exercise for mobility training. It helps with developing lower body strength, and relieving knee pain. By include this exercise in your regimen, you will not only improve your flexibility and mobility, but you will also develop a strong and resilient lower body. Remember to focus on appropriate form, advance gently, and listen to your body. Begin receiving the benefits of the ATG split squat immediately and transform your mobility training.


For more visit:

mobilityabilityagility.com

or here

How To Do an ATG Split Squat

Click here to display content from YouTube.
Learn more in YouTube’s privacy policy.

The ATG Split Squat: A Game-Changing Exercise for Strength and Mobility

The host introduces his favourite exercise, the ATG split squat, in this video. He reveals that he has designed unique equipment called ATG friends to efficiently do this activity. The ATG split squat focuses on range of motion and hip flexor activation. The host emphasises the necessity of obtaining the perfect rep by maximising the range of motion with the load.

Exploring the ATG Split Squat

The host demonstrates and instructs a participant on how to perform the ATG split squat. They begin by performing five sets of four to six reps each leg. The exercise works the participant’s back and left hip. The host instructs them to lengthen their rear hip flexors and compliments them on their form. They keep going with the workout, concentrating on stretching, and get positive feedback from the host.

Benefits for Weightlifters and Mobility

The host explains how the ATG split squat can help weightlifters by correcting imbalances on both sides of the body. It can also be used to improve leg drive and provide a respite from regular movement patterns. This exercise can relieve knee pain and potentially assist the lower back by engaging the hip flexors and achieving true hip extension. The host emphasises the need of adding load to stretches in order to increase their effectiveness.

Increased Range of Motion

The participant and the host demonstrate the ATG split squat side by side. They use weights to achieve greater depth and range of motion. The host adds that the exercise stretches the glutes and targets the vastus medialis oblique (VMO), perhaps resulting to gains in strength and mobility. They demonstrate the distinction between static stretching and loaded stretching for optimal results.

Building Strength and Mobility

The participant and the host demonstrate the ATG split squat side by side. They use weights to achieve greater depth and range of motion. The host adds that the exercise stretches the glutes and targets the vastus medialis oblique (VMO), perhaps resulting to gains in strength and mobility. They demonstrate the distinction between static stretching and loaded stretching for optimal results.

Modification with Reverse Bands

The host provides a tweak for individuals who are having difficulty with the ATG split squat. Individuals can gradually advance to bodyweight squats by employing reverse bands to lower the burden. This change allows people of all fitness levels and abilities to participate in the activity and reap its advantages. The host recognises resistance bands’ adaptability and their capacity to support better posture and strength development.

ATG Split Squat

The ATG split squat is hailed as a game-changer for strength and mobility. It offers a comprehensive workout targeting various muscle groups and improving range of motion. By utilizing the ATG buddies and focusing on proper form and intention, individuals can experience long-term gains in strength, flexibility, and overall physical fitness. The exercise is inclusive, adaptable, and can be modified to suit different fitness levels and needs. With the ATG split squat, anyone can achieve their fitness goals and improve their physical well-being.

For more go to:

mobilityabilityagility.com

or Youtube

Knee Pain When Squatting

Click here to display content from YouTube.
Learn more in YouTube’s privacy policy.

Knee Pain When Squatting (FULL EVALUATION & FIX)

Paige had knee pain when squatting as part of her back injury recovery. It’s crucial to recognise that pain symptoms may not always come from the affected area if you want to identify the underlying source of the pain. The assessment and treatment of knee pain are the main topics of this video, which also looks at the hip and ankle because they can also cause knee pain.

Assessing Ankle Mobility

The presenter started the screening procedure by assessing Paige’s ankle mobility. Paige had adequate hip mobility but had trouble on one side getting her knee to the table, which mimicked her knee pain. Paige also reported tightness in her left ankle when attempting to rotate her foot. This emphasised how crucial it is to address ankle mobility in order to relieve knee pain.

Correcting Ankle Mobility

Using a resistance band, a technique was used to increase Paige’s ankle mobility. Paige gripped the ground with her foot and drove her knee outwards while applying resistance as she positioned the band beneath the base of her big toe. She performed this exercise ten times, which targeted her lateral glutes. Paige was able to move her ankle more easily after this intervention because of an improvement in her mobility.

Joint Mobilization

A banded joint mobilisation approach was performed since Paige still had some mobility restrictions. The band was placed on the top of her foot, bringing the shin forward naturally while lowering the tailless bone. Paige showed substantial improvement after doing ten repetitions of this exercise when she was able to touch her knee and obtain symmetrical ankle mobility.

Reassessing Mobility and Pain Reduction

After addressing the restrictions on ankle and tibial rotation, Paige’s knee pain was reevaluated. During her squats, Paige reported experiencing no discomfort, demonstrating the effectiveness of the pain intensity reduction. She was able to resume hard squatting the next week because her knee movements were pain-free.

Looking Beyond the Site of Pain

The significance of not concentrating simply on the site of symptoms when treating knee pain is emphasised by this case study. It is essential to take into account locations both above and below the impacted site. The discomfort was reduced in Paige’s instance by increasing ankle mobility, which also indirectly benefited the knee. A more thorough remedy was attained by addressing the fundamental cause as opposed to only the symptoms.

Knee Pain When Squatting

The video emphasises the need of looking into regions outside of the area of pain to properly treat knee pain. In the instance of Paige, restricted ankle mobility and tibial rotation were the cause of her knee pain. Her pain was fully eliminated by using targeted workouts and joint mobilisation methods, allowing her to continue her squats regimen pain-free. This is an important reminder that treating knee pain holistically is necessary, taking into account the interconnection of the body’s numerous joints and mobility.

Find more at:

mobilityabilityagility.com

or

YouTube

Improve Your Mobility

Improve Your Mobility

Click here to display content from YouTube.
Learn more in YouTube’s privacy policy.

Improve Your Mobility and Flexibility

Improve Your Mobility and Flexibility, Ben, introduces a mobility and flexibility exercise in this video that aims to strengthen several muscle groups. The value of flexibility and how it might improve athletic performance are stressed by him. The exercise is made to be scalable, which allows for various levels of fitness to be accommodated. Let’s investigate the benefits of the exercises.

Start with the Big Toe

Ben begins by talking about the importance of the big toe in terms of mobility. He says a lot of patients who have knee problems also have tight big toes. It becomes simpler to lean back and enhance overall mobility by progressively putting pressure on the big toe and developing flexibility.

Addressing Calf Muscles

Ben then draws attention to the stiffness in the calf muscles, which is sometimes brought on by modern footwear with extra heel cushioning. He uses a slat board to show how a quick workout may loosen up this stiffness and additionally increase flexibility. People can lean forward and increase their movement by actively engaging their calves.

Expanding to the Hips

Ben introduces hip-targeting movements while concentrating on hamstring and upper calf tension. He shows how to hold a 90-90 position and discusses how simple it is to do so by regularly stretching. These exercises aid in maintaining flexibility and improving lateral mobility, both of which are essential for a variety of sports.

Internal Rotation and Hip Flexibility

The presenter talks about how crucial internal rotation is for hip flexibility. He argues that exercising the hips on both sides is advantageous for sports that call for lateral motion. Ben displays various postures for enhancing internal rotation, such as leaning back and then using the Sartorius muscles.

The Butterfly Stretch and Couch Stretch

Ben then performs the butterfly stretch, which focuses on the muscles in the groyne. He advises supporting yourself against the wall while progressively deepening the stretch. He also highlights the sofa stretch, an activity that can change a person’s life after having knee surgery. Maintaining consistency in these stretches promotes lower body mobility and flexibility.

Full Range of Motion

The final exercise in the lower body mobility regimen, the ass to grass split squat, is shown by the presenter. Without elevating the heel or touching the back knee to the floor, he displays the ideal front hamstring position with the calf covered. Full range of motion is required for this exercise, and Ben understands that not everyone will be able to do so right away.

Shoulder Routine

Ben starts a bonus exercise that emphasises shoulder mobility. To avoid shoulder problems, he emphasises the significance of strong external rotation muscles. People can strengthen their shoulder joint’s flexibility and range of motion by performing workouts like pullovers and external rotation. Athletes who play football and tennis will especially benefit from this.

Improve Your Mobility

Finally stresses the value of combining strength and flexibility in preserving total mobility. No matter where they are at right now, he exhorts people to begin working on their flexibility because sustaining flexibility is easier than developing it. Individuals can improve their sports performance and lower their chance of injuries by regularly including these workouts into their routines.

for more mobility visit:

mobility ability agility

or

YT

Knee Mobility Exercises Love Yourself, Train From Ground Up

Knee Strengthening Exercises

Click here to display content from YouTube.
Learn more in YouTube’s privacy policy.

Transforming Your Fitness Journey: Building Strength and Confidence With Knee Mobility Exercises

Background: Overcoming Challenges

In 2019, I hurt my back and stopped using barbells because they felt unsafe. Instead, I tried single-leg training, hoping it would be safer. But it still caused my back to hurt. I felt frustrated and limited in what I could do. But I was determined to find a solution knee mobility exercises Love Yourself And Train From The Ground Up.

Discovering a New Approach: Ground-Up Training

I found a different way to train—starting from the basics. Instead of intense exercises that hurt my back, I focused on simple movements that built strength. This made me feel hopeful and excited.

Progress and Confidence: Bridging the Gap

As I kept at it, I noticed I was getting better and feeling more confident. These exercises gave my back a rest and also helped with other related issues. I was happy to find exercises that didn’t hurt my back and filled in the gaps in my overall fitness.

Overcoming Fear: Conquering Back-Intensive Exercises

Feeling more confident, I started doing exercises that worked my back. Even though I was told they were risky, I realized the real risk was in my unprepared body. By taking it slow and building strength gradually, I showed myself that I could do these exercises and get rid of my fear.

Embracing a Comprehensive Approach: Unleashing Potential

This journey taught me that fitness is more than just one thing. It’s about building a strong foundation, growing little by little, and trying new things. It transformed my body and made me believe in myself again.

Unlocking Your Potential: Embrace the Challenge

If you’re facing setbacks or feeling limited in your fitness journey, remember there’s always a way forward. Work on your weaknesses, take small steps, and embrace challenges. You can transform your fitness journey and reach your goals. Believe in yourself and create a body that can handle anything. Take the opportunity and start your own transformation.

Find more at:
Mobility Ability Agility

ATG