Skip to content

Knees over toes guy

Hip Mobility Unleashed: 5 Secrets For Pain-Free Movement!

Hip Mobility

Click here to display content from YouTube.
Learn more in YouTube’s privacy policy.

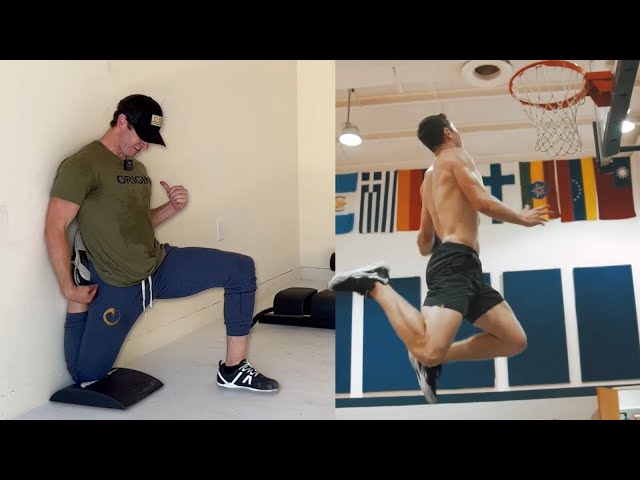
This YouTube video demonstrates various hip mobility exercises for improving hip flexibility and strength. Ben demonstrates a series of exercises aimed at increasing hip ability and discusses their benefits, scaling options, and personal experiences. Indeed, these exercises are designed to help individuals enhance their hip mobility, prevent injuries, and improve sports performance. In this summary, we will break down the content into several sections and provide an overview of the key information.

The video starts by introducing the importance of hip mobility. So, Ben explains that hip mobility is essential for strength, flexibility, and injury prevention. Indeed, He emphasizes that the exercises demonstrated are a gentle and scalable way to improve hip mobility.

Hip Mobility Exercises

Head to Foot Exercise

Ben starts by doing the “Head to Foot” exercise. Furthermore, they describe good form, emphasising the importance of squeezing the glutes, engaging the abs, and keeping the knees off the floor. Change the bench angle, advance from assisted to unassisted, or add extra weight to scale this exercise.

Glute Contraction and Tibiofibular Dislocation

In addition, The movie emphasises the need of hip mobility for people suffering from conditions such as tibiofibular dislocation. The teacher describes how training on hip mobility might help with these issues. They provide certain techniques to prevent knee bone dislocation.

Scaling Options

There are multiple ways to scale the exercises, you can elevate the front foot or using assistance. In addition, tailor to your individual needs and abilities.

Stretching and Contracting

The importance of stretching and contracting hip muscles. The instructor shares their personal practice of 20 reps per set for three sets on their mobility day. They mention the importance of maintaining safety while progressing to more challenging levels.

Advanced Mobility Techniques

Furthermore, the video mentions a few advanced mobility techniques, including a shoutout to someone named Kadur Ziana, who is a flexibility mentor. These techniques are an additional means of improving hip ability.

Conclusion and Additional Tips

Ben summarises how these exercises are typically used in their training programmes, both as part of long-term full-body programmes and as part of short-term specialised protocols. These exercises are flexible and scalable. The film closes with advice on where to obtain additional programmes and equipment suggestions.

Key Takeaways

It does, in fact, provide a step-by-step guide to various hip ability exercises. The most important lessons are the importance of hip mobility for strength and flexibility, the importance of safe and progressive growth, and the numerous scaling choices available to people. Long-term training programmes or short-term targeted mobility work.

Individuals can improve their hip mobility, reduce their chance of injury, and improve their overall athletic performance by implementing these exercises into their routine. The video encourages viewers to incorporate these exercises into a well-rounded workout routine.
https://mobilityabilityagility.com/

https://mobilityabilityagility.com/

Strengthen Your Feet and Ankles with Simple Exercises

Strengthen Your Feet

Click here to display content from YouTube.
Learn more in YouTube’s privacy policy.

Strengthen Your Feet and Ankles with Simple Exercises

Strengthen your feet and ankles: We’re going to explore an easy and cost-effective way to strengthen your feet and ankles. Indeed, You’ll discover a simple protocol that involves walking backward and how it can help improve your athletic abilities while addressing common issues with your feet. Anyone can access it without the need for expensive equipment. Let’s dive into this innovative approach.

The Foot Protocol: Strengthen Your Feet by Walking Backward with Intention

Discovering the Big Toe

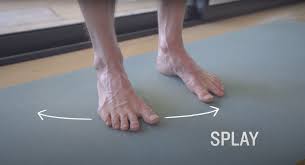
Have you ever thought about your big toe? In this protocol, we’re focusing on your big toe’s role in strengthening your feet and ankles. Many people often overlook the big toe, but it plays a vital role in your overall foot health. The key is to feel your big toe with every step.

Decades in Shoes

Consequently, Many of us have spent decades wearing shoes that aren’t shaped like feet. This may sound strange, but most shoes are designed for fashion rather than foot health. Moreover, Over time, our big toes can become jammed or misaligned due to these poorly designed shoes.

Shoes Shaped Like Feet

What’s more, To address this issue, it’s essential to find shoes that are shaped like feet. These shoes allow your toes, especially the big toe, to sit naturally. In some cases, you might even need a spacer to ensure your big toe remains straight.

Notable Results

When you start paying attention to your big toe and make an effort to feel it while walking, you may experience noticeable improvements. Your big toe will strengthen, and you might even feel your leg muscles engage better. While there isn’t an exact measure for this, it’s a simple practice that can benefit many.

The Power of Full Range of Motion

Strengthening Ankle Through Full Range of Motion

The key to this protocol is to strengthen your ankles through their full range of motion. In contrast, Many expensive alternatives are available, but this simple practice can often yield better results. It’s an affordable way to work on your athletic abilities.

Start with Walking

The great thing about this exercise is that almost anyone can do it. You can start by walking backward, even if your steps are as small as one inch. The focus is on engaging your ankles and working on their flexibility.

Introducing Tibialis Raises

Similarly, If you’re looking to intensify your routine, you can introduce tibialis raises. These exercises target the muscles on the front of the lower leg. Even starting with just one pound of resistance can make a significant difference.

Transforming Weak Links into Strength

This protocol is about identifying weak links in your body and transforming them into strengths. Indeed, Weak links often lead to malfunctions and injuries. By focusing on strengthening your ankles, you can prevent these issues.

Further Study: Knees Over Toes

Exploring Kadur Xan’s book on Amazon is recommended for a deeper understanding of feet and ankle health. Xan, known for his impressive athletic abilities, is a strong advocate for knees-over-toes training. He’s a living example of the benefits of strong feet and ankles, and his insights can further inspire your journey to better foot health.

Innovative Equipment: The Backward Treadmill

For those looking to take their foot and ankle training to the next level, further, consider the innovative backward treadmill. Designers created these treadmills to provide athletes with a highly effective technique: the experience of dragging a sled backward.. This equipment is accessible and cost-effective, making it a great addition to your training routine.

Gratitude for Early Supporters

Additionally, The backward treadmills are now available thanks to the support of early enthusiasts of this training approach. Therefore, The 1.0 version is already making a difference in people’s lives, and the Ben is dedicated to further improving this equipment to provide even more benefits.

Strengthen Your Feet and Ankles with Simple Exercises

Strengthening your feet and ankles is a simple yet powerful way to enhance your athletic abilities and prevent injuries. Moreover, The foot protocol involving walking backward with intention, paying attention to your big toe, and using innovative equipment like the backward treadmill can transform your fitness routine. Although, this approach is accessible to everyone and doesn’t require expensive alternatives. In sum, It’s a reminder that sometimes the simplest methods are the most effective. So, start focusing on your feet, and you’ll be amazed at the positive impact it can have on your overall well-being.

https://mobilityabilityagility.com/

https://mobilityabilityagility.com/

🚀 Be the first to know! Join Our Inner Circle for Exclusive Updates 🚀

Welcome to our inner Inner Circle! Get ready to dive into a world of blog updates and exciting product launches, delivered straight to your inbox.

🔥 What’s in it for you?

  • Stay ahead of the curve with up-to-the-minute blog post releases.
  • Be the first to discover our latest products and offerings before anyone else.
  • Access free updates on our newest blog posts, packed with valuable insights.

Join our tribe of forward-thinkers, early adopters, and knowledge seekers. By subscribing, you’ll be part of a like-minded community committed to growth, learning, and staying in the know.

Expect engaging content, actionable tips, and a touch of inspiration. We’re excited to embark on this journey with you. Welcome aboard!

[Sign Up] 👉 Let’s explore, learn, and grow together! 🌟

How to Train Rotation for the Lower Back Pain (not how you think)

Click here to display content from YouTube.
Learn more in YouTube’s privacy policy.

Let’s dig into the topic of rotation in fitness training for lower back pain. This has been a popular question among my viewers, and now I’m going to explain why I no longer prioritise training rotation. I’ll also talk about my fitness journey and how my approach has developed over time.

The Concept of Training Rotation

To begin, I want to emphasise that training rotation is not a negative notion in and of itself. In fact, it’s a necessary part of resolving lower back pain. When I first started working out in 2016, I learned about numerous movement patterns such as the push, pull, squat, hinge, and core stabilisation. Rotation training was included in this equation, including workouts such as anti-rotation movements, chops, and lifts.

The Quest for Trunk Stability

Training rotation is important since many injuries occur during ordinary activities that include rotational motions. For example, if you’ve ever had persistent back pain, it could have been caused by relatively simple movements such as tying your shoe or picking up your child, rather than lifting big weights. The ability to stabilise your core and resist rotation becomes critical for injury avoidance in these scenarios.

My Personal Struggles with Rotation Training

Let’s take a step back to set the stage for my current approach. I suffered a devastating disc injury in 2019 that left me in excruciating discomfort. I attempted every trunk stability exercise I could think of, from dead bugs to cable chops and twists. Yet, despite my best attempts, my back would give up whenever I performed quick or athletic motions.

Understanding Lower Back Pain as a Life Skill

At this time, I began to doubt the concept of rotation training. I realised that rotation is more than just an exercise; it is an essential life skill. Life’s movements are unpredictable, varied, and frequently faulty. We twist, turn, and bend to varying degrees, which cannot be completely recreated in a gym setting.

The Myth of the Rotational Muscle

The kicker is that there is no special muscle in your body dedicated only to rotation. While muscles such as the transverse abdominis, obliques, and quadratus lumborum (QL) play important roles in rotation, none of them operate alone to rotate your body. Rotation is a complicated combination of attributes, each of which must be cultivated before they can be effectively integrated.

Addressing Tight Links

Now that we’ve deconstructed rotation, let’s look at how we may get our bodies ready for it. We’ll begin by fixing the tight linkages that frequently impede rotation. The outside glutes are the first place to concentrate on. The elevated pigeon stretch can help to free up this area. This stretch relieves stress in the outer glute muscles, which when tight can impair rotation.

Unlocking the Hip Flexors to Fix Lower Back Pain

Hip flexors are another tight link that need care. Tight hip flexors can make it difficult to completely extend your hips, which is necessary for generating power in rotational activities. The split squat is an excellent workout for this. This movement not only stretches the hip flexors but also aids in the development of strength and mobility.

Strengthening Lower Back Pain

Let us now address the weakest link in the chain, rotation. The single-leg back extension is one of the most effective exercises for developing rotational strength. By switching from two to one leg, you test your core and the muscles around your spine to prevent tipping, which improves stability.

The Power of the Quadratus Lumborum (QL)

Next, we must concentrate on the quadratus lumborum (QL). This muscle is crucial for rotation, hence strengthening it is essential. Side bends can help you strengthen your QL. This lateral extension action aids in the development of strength and stability in this sometimes overlooked muscle.

The Path to Balanced Rotation

To recap, the goal here is not to eliminate rotation from your workout regimen, but rather to completely prepare your body for it. Equilibrium is crucial. To realise the full potential of rotation, you must treat both tight and weak linkages in your body. The method entails increasing flexibility, strengthening important muscles, and achieving harmony between these components.

The Importance of Balance in Training

It’s critical to recognise that we experience both quick, high-velocity movements and slower, regulated acts in our daily lives. Before diving into high-speed activities, you must first build a strong foundation of strength and mobility. This is where your training’s balance becomes apparent.

Experimenting with Opposite-Side Training for Lower Back Pain

Training the opposite side of your dominant side is an intriguing experiment to investigate. If you’re an athlete, especially if you play sports that require rotation, such as baseball or golf, try integrating warm-up activities that mirror motions on your non-dominant side. This can help your body balance out and potentially minimise your chance of damage.

Finally, the choice not to focus on training rotation in the traditional sense stems from a greater awareness of how our bodies move and the necessity to prepare thoroughly for life’s unpredictability. It is all about correcting weak links, strengthening tight links, and achieving balance in your training. Remember that rotation is a fundamental life skill, and you may better equip yourself by treating your body holistically.

https://mobilityabilityagility.com/

https://mobilityabilityagility.com/

Reverse Squat: Unlock Your Potential for Mobility and Strength

The Reverse Squat

Reverse Squat: Unleash Your Hip Flexor Strength and Power

Welcome to mobilityabilityagility.com, your one-stop shop for exercises and training in mobility. This article will go over the amazing advantages and methods of the reverse squat, a specific exercise made to strengthen the hip flexor muscles. The Reverse Squat is a game-changer for anyone looking to improve their overall strength and mobility, whether they are a sprinter seeking explosive lower body power or someone else. Let’s examine the specifics and learn how this exercise can help everyone, from competitive athletes to regular exercise enthusiasts.

Understanding Hip Flexor Strengthening

The hip flexor muscles, a collection of muscles at the front of your hips, are the focus of the reverse squat. On your back, while using resistance attached to your feet—such as a strap attached to a cable machine or a resistance band—bring your knees to your chest.

Through the Reverse Squat, you can fully activate the hip flexors and reap all of its health and fitness benefits. Many people suffer from weak hip flexors. Your hip flexors can also be tight. Lower back pain, hip pain, and injury can all result from tight and weak hip flexors. Yoga poses and other hip flexor exercises can help to relax the muscles. Additionally we need strength. We can get this from the reverse squat.

Benefits of the Reverse Squat for Explosive Lower Body Power

  1. Sprinters’ Secret Weapon: The Reverse Squat has long been a mainstay in the training regimens of sprinters and other athletes who need to have explosive lower body power, like running backs. This exercise enhances the drive and power produced from the legs during explosive movements by working the hip flexor muscles.
  2. Enhanced Athletic Performance: Strengthening the hip flexors through the reverse squat can help athletes perform better in a variety of sports, including sprinting, jumping, and direction-changing movements.
  3. Increased Range of Motion: The Reverse Squat encourages hip flexor flexibility and mobility, giving you more range of motion for exercises like high knee lifts and kicks that call for deep hip flexion.
  4. Core Activation: Reverse squats improve core strength and stability, which improves overall athletic performance. Core activation: During the Reverse Squat, your core muscles contract to stabilise your body.
  5. Versatility for All: Programmes like the ATG Knees Over Toes, which highlight the Reverse Squat’s value for people of all fitness levels, have helped it gain recognition outside of the world of professional athletes. For anyone looking to improve hip flexor strength and overall lower body power, it presents a flexible exercise option.

Performing the Reverse Squat

  1. Starting Position: Laying on your back with your knees bent and your feet flat on the ground is the starting position. Use a strap to secure a cable machine, or wrap your feet in a resistance band.
  2. Technique:
    • a. Engage your core and firmly grasp the resistance band or strap of the cable machine.
    • b. While keeping control and tension on the strap or band, slowly bring your knees up to your chest.
    • c. Take a brief break at the top of the movement and concentrate on tightening your hip flexors.
    • d. Return your legs gradually to the starting position while keeping tension and control throughout the exercise.
  3. Repeat: As your strength and comfort level grow, gradually increase the number of sets you perform, aiming for 10–12 repetitions each time.

Safety Tips and Modifications

  1. Take Note of Your Body: While performing the exercise, pay attention to any discomfort or pain. Stop exercising right away and seek medical advice if you feel any severe or sharp pain.
  2. Proper Resistance Selection: Select the right amount of resistance to challenge your muscles while still enabling good form and control throughout the movement.
  3. Seek Professional Advice: It is advised to speak with a qualified trainer or healthcare provider for advice and modifications if you have any pre-existing hip or lower back conditions.

The Reverse Squat is an effective exercise that targets and strengthens the muscles in the hip flexors, unlocking explosive lower body power and improving athletic performance. Additionally, The Reverse Squat offers a variety of advantages. Moreover, whether you’re a sprinter, an athlete looking to increase their agility, or a regular person looking to maximise your lower body strength.

Accept the strength of this exercise and be amazed at the improvements it can make to your performance, mobility, and overall fitness. With the reverse squat, you can strengthen and amplify your hip flexors.

Additionally for more go to:

mobility ability agility

Elephant Walk: Embrace The Challenge, Crush Your Fears, And Emerge As The Unstoppable Force!

Elephant Walk

You’ve come to the right place if you’re looking for mobility training and exercises: mobilityabilityagility.com. We will explore the amazing advantages of the Elephant Walk. Indeed, a potent exercise that works the hamstrings, calves, hips, and lower back. You can increase flexibility, improve athletic performance, prevent injuries, and encourage healthy ageing by incorporating this exercise into your routine.

The Elephant Walk and Its Mechanics

The Elephant Walk is a dynamic workout in which the knees are bent and extended as the hips are hinged forward. This exercise routine focuses on the hamstrings, calves, hips, and lower back. You may enhance your flexibility and range of motion by activating these muscle groups.

Unlocking the Benefits

  1. Improved Hamstring Flexibility: The Elephant Walk stretches the hamstrings, which are important for motions like running, jumping, and squatting. Improved hamstring flexibility can lead to improved performance and a lower chance of muscle injuries.
  2. Increased Hip Range of Motion: The exercise also develops hip flexibility, which allows for better mobility and stability during daily activities and sports. It can assist to reduce hip stiffness and pain while also improving overall movement quality.
  3. Athletic Performance Improvement: Flexible hamstrings and hips are essential for athletic performance. You may improve your agility, speed, and power by implementing the Elephant Walk into your training programme, providing you an advantage in a variety of sports and hobbies.
  4. Injury Prevention: Tight hamstrings and restricted hip mobility might increase the likelihood of strains and sprains. Regular Elephant Walk practise can minimise muscle imbalances and improve joint alignment, minimising the risk of injury during athletic activity.
  5. Healthy Ageing: Maintaining flexibility becomes increasingly vital as we age. The Elephant Walk promotes greater posture, mobility, and independence in everyday life by counteracting the natural loss of flexibility that comes with age.

Performing the Elephant Walk

  1. Starting Position: To make the exercise more accessible, place your hands on an elevated surface, such as a bench or step. Reduce the height of the surface gradually until you can easily reach the floor.
  2. Proper technique: Stand with your feet hip-width apart, slightly bend your knees, and lean forward at the hips while maintaining your back straight. Your hamstrings and calves should feel a slight stretch.
  3. Controlled Movement: Extend your knees slowly, pulling your hips back and reaching towards the floor. Maintain control during the exercise, concentrating on the stretch in your back legs.
  4. Breathing and Duration: Hold the extended position for 10-30 seconds, breathing deeply and naturally. Repeat the exercise for 3-5 sets, progressively increasing the number of reps.

Safety Precautions and Modifications

  1. Pay Attention to Your Body: Pay attention to your body’s responses and modify the stretch intensity accordingly. To avoid strain or injury, do not push yourself beyond your comfortable range of motion.
  2. If reaching the floor is difficult, use supports like yoga blocks or books to hold your hands at a height that allows for a comfortable stretch.
  3. Individual Considerations: If you have any current knee or lower back concerns, you should check with a healthcare practitioner before undertaking the Elephant Walk to verify it is appropriate for your requirements.

Furthermore, including the Elephant Walk in your mobility training regimen can result in significant gains in hamstring flexibility, hip range of motion, athletic performance, injury avoidance, and healthy ageing. Remember to use good technique, listen to your body, and advance slowly on your flexibility journey. Indeed, Accept the Elephant Walk and get the advantages of improved mobility and general well-being!

For more click here:

mobility ability agility